> ## Documentation Index
> Fetch the complete documentation index at: https://docs.penbox.io/llms.txt
> Use this file to discover all available pages before exploring further.
# Automatic case status transitions
> Drive case statuses from data schema values or step completion — watch fields, set conditions, and keep running cases current without manual updates.
In [Configure statuses in a case template](/guides/configure-case-template-statuses), you shaped **child statuses** so the lifecycle matches your process. This guide adds **automatic transitions**: when watched **data** or **steps** satisfy a **condition**, Penbox can move the case into the right **status** without someone clicking through each change.
You will configure **both** kinds of triggers on one template: a transition when a **step** reaches **completed**, and another when a **data schema** field is **defined**. The example uses **Collect info about new employee**; swap step identifiers and `data.*` paths for your own template.
**Auto-transition conditions are Penscript-powered.** The JSON you put under **`condition`** is evaluated with the same **Penscript** engine as everywhere else in Penbox: you can use **any Penscript function, operator, or pattern** the language supports (not only the `:eval` / `:defined` examples below). When in doubt, start with [Penscript](/penscript/introduction), [How Penscript works](/penscript/how_it_works), and the [Penscript reference](/penscript/reference).
## What you'll build
When you finish, your **case template** will:
* Open **Statuses** in **Case settings** and attach **auto-transition conditions** to specific **child statuses**
* Use **`watch`** so the engine knows which **data keys** or **steps** to observe
* Use **`condition`** with **`:eval`** (expression) or **`:defined`** (field present) — and extend with **full Penscript** where you need richer logic
* Be ready for **running cases** whose status stays aligned with form completion and captured fields — after you click **Save**
**Estimated time:** 10–15 minutes
***
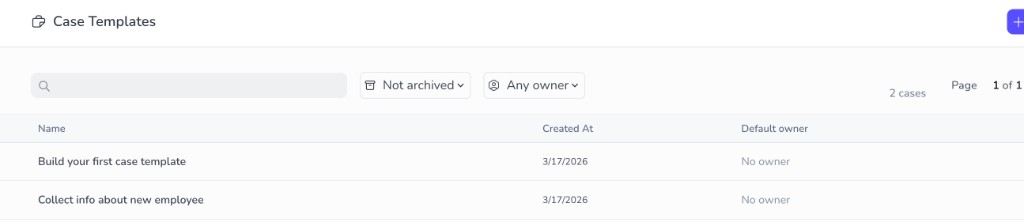
Go to **Templates** → **Cases**, then open the **case template** you want to automate (for example **Collect info about new employee**).
 In **Template Edition**, click the **settings** (gear) icon in the upper-right corner.
 In **Case settings**, under **Case lifecycle**, select **Statuses**.
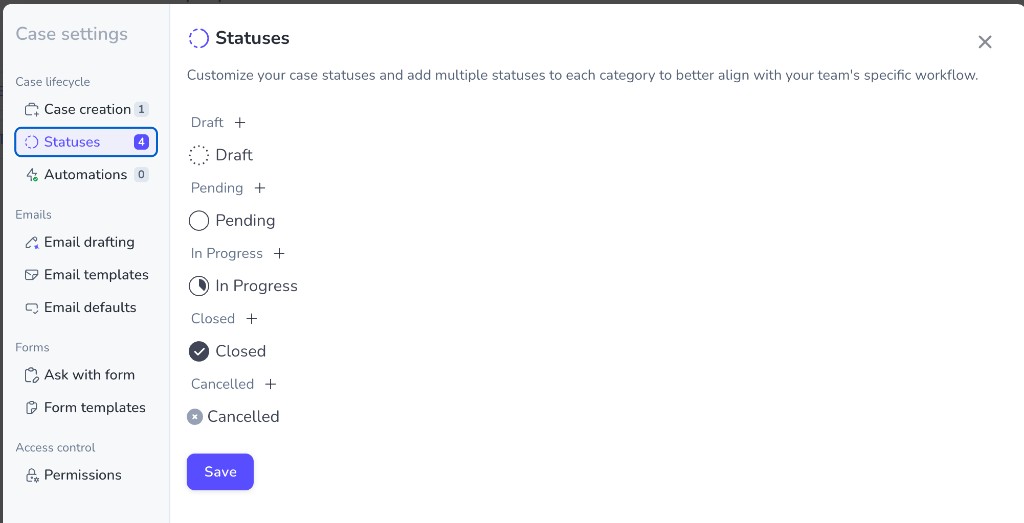 Click the **child status** that should be reached automatically when your condition becomes true (for example a custom **In Progress** child such as **Info collected from the new employee**, or **Closed**).
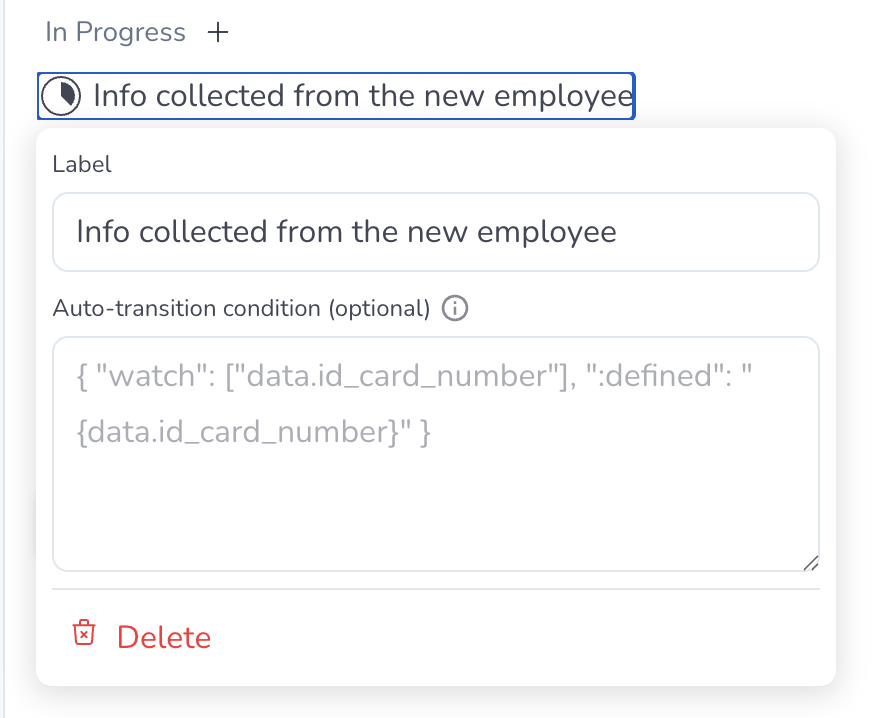
In the panel, find **Auto-transition condition (optional)**. Every condition uses the same overall shape:
1. **`watch`** — an array of paths to observe. Use **`data.…`** paths for schema values (for example `data.bank_name`) or **`steps.…`** for a step in this template (for example `steps.mail-new-employee-1`).
2. **`condition`** — rules that must hold for the transition to run. Common patterns include **`:eval`** with an expression (often on step state) and **`:defined`** to require that a data field has a value. Everything here is **Penscript**: the same functions and syntax as in flows, templates, and the rest of the docs apply.
See [Penscript](/penscript/introduction) for variables, [logic](/penscript/logic), [dates](/penscript/dates), [arrays](/penscript/arrays), and the full [reference](/penscript/reference) — use them inside **`condition`** the same way you would in any other expression field.
Click the **child status** that should be reached automatically when your condition becomes true (for example a custom **In Progress** child such as **Info collected from the new employee**, or **Closed**).
In the panel, find **Auto-transition condition (optional)**. Every condition uses the same overall shape:
1. **`watch`** — an array of paths to observe. Use **`data.…`** paths for schema values (for example `data.bank_name`) or **`steps.…`** for a step in this template (for example `steps.mail-new-employee-1`).
2. **`condition`** — rules that must hold for the transition to run. Common patterns include **`:eval`** with an expression (often on step state) and **`:defined`** to require that a data field has a value. Everything here is **Penscript**: the same functions and syntax as in flows, templates, and the rest of the docs apply.
See [Penscript](/penscript/introduction) for variables, [logic](/penscript/logic), [dates](/penscript/dates), [arrays](/penscript/arrays), and the full [reference](/penscript/reference) — use them inside **`condition`** the same way you would in any other expression field.
 Replace **`steps.mail-new-employee-1`** with the **technical id** of your step (as it appears in the template). Replace **`data.bank_name`** with your **data schema** path.
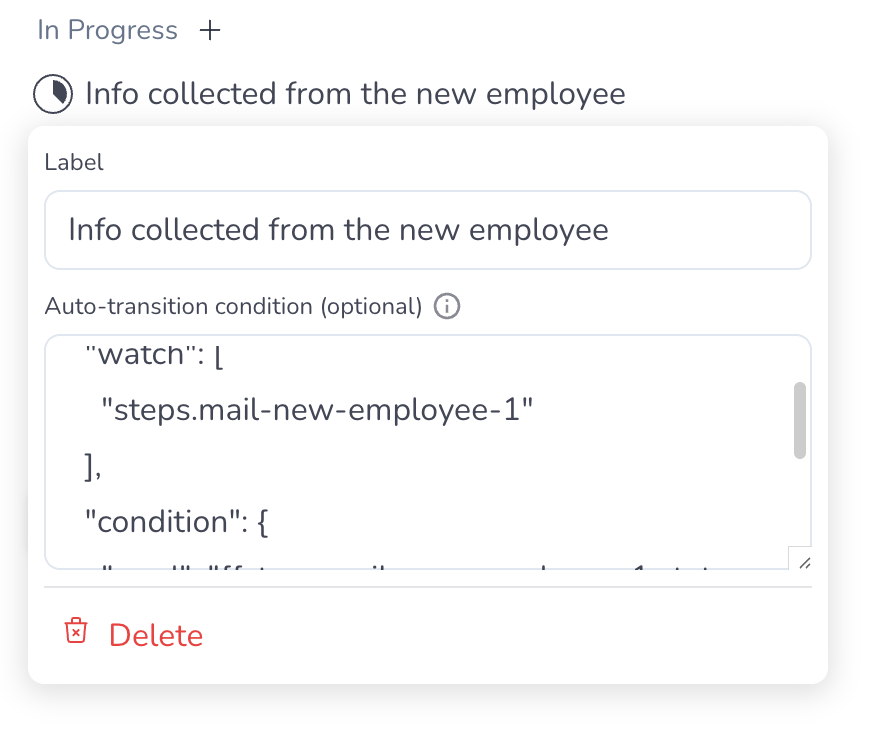
For the status **Info collected from the new employee**, transition when the first onboarding step has finished — for example when an **email + form** step reaches **completed** (the new employee submitted the form).
Paste a payload like this into **Auto-transition condition (optional)**:
```json theme={null}
{
"watch": [
"steps.mail-new-employee-1"
],
"condition": {
":eval": "{{steps.mail-new-employee-1.status == 'completed'}}"
}
}
```
Replace **`steps.mail-new-employee-1`** with the **technical id** of your step (as it appears in the template). Replace **`data.bank_name`** with your **data schema** path.
For the status **Info collected from the new employee**, transition when the first onboarding step has finished — for example when an **email + form** step reaches **completed** (the new employee submitted the form).
Paste a payload like this into **Auto-transition condition (optional)**:
```json theme={null}
{
"watch": [
"steps.mail-new-employee-1"
],
"condition": {
":eval": "{{steps.mail-new-employee-1.status == 'completed'}}"
}
}
```
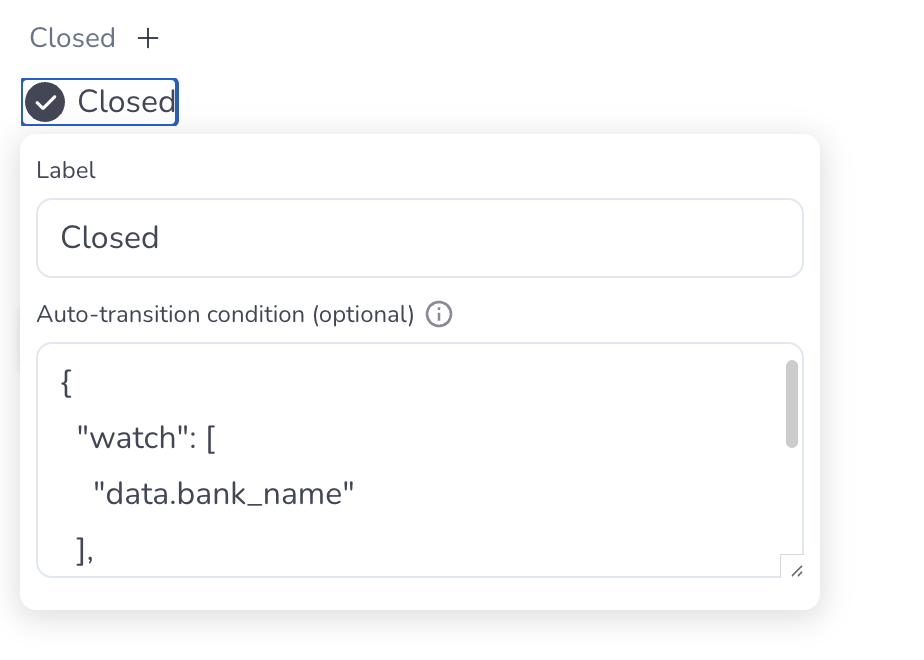
 For the **Closed** status (or any status you choose), transition when **bank name** is present in case data — for example after **Penbox Intelligence** extraction or manual entry fills **`data.bank_name`**.
Select the **Closed** child (or your target status), then use:
```json theme={null}
{
"watch": [
"data.bank_name"
],
"condition": {
":defined": "{data.bank_name}"
}
}
```
For the **Closed** status (or any status you choose), transition when **bank name** is present in case data — for example after **Penbox Intelligence** extraction or manual entry fills **`data.bank_name`**.
Select the **Closed** child (or your target status), then use:
```json theme={null}
{
"watch": [
"data.bank_name"
],
"condition": {
":defined": "{data.bank_name}"
}
}
```
 Click **Save** on the **Statuses** screen when both conditions are in place and correct for your template.
***
## Step status values (quick reference)
Mail and mail+form steps expose different **status** strings. Use the values below when you write **`:eval`** conditions that compare your step path (for example **`steps.mail-new-employee-1.status`**) to the right value.
**Mail** (email only)
| Stage | `status` value |
| ------------- | -------------- |
| Mail not sent | `pending` |
| Mail sent | `executed` |
**Mail + form** (email with a form)
| Stage | `status` value |
| -------------- | -------------- |
| Form sent | `pending` |
| Form opened | `ongoing` |
| Form completed | `completed` |
***
## You're done
Your **case template** can now **advance statuses automatically** from **step** progress and from **data** appearing on the case. Running cases stay closer to reality without extra manual clicks, as long as **`watch`** lists everything that should trigger a re-check and **`condition`** matches what you intend.
***
## What's next?
Add or rename child statuses if you have not already.
Expression language for conditions — functions, variables, and reference.
Explore broader automation options for cases.
Read how parent and child statuses work in Penbox.
Validate behavior on a live case.
Click **Save** on the **Statuses** screen when both conditions are in place and correct for your template.
***
## Step status values (quick reference)
Mail and mail+form steps expose different **status** strings. Use the values below when you write **`:eval`** conditions that compare your step path (for example **`steps.mail-new-employee-1.status`**) to the right value.
**Mail** (email only)
| Stage | `status` value |
| ------------- | -------------- |
| Mail not sent | `pending` |
| Mail sent | `executed` |
**Mail + form** (email with a form)
| Stage | `status` value |
| -------------- | -------------- |
| Form sent | `pending` |
| Form opened | `ongoing` |
| Form completed | `completed` |
***
## You're done
Your **case template** can now **advance statuses automatically** from **step** progress and from **data** appearing on the case. Running cases stay closer to reality without extra manual clicks, as long as **`watch`** lists everything that should trigger a re-check and **`condition`** matches what you intend.
***
## What's next?
Add or rename child statuses if you have not already.
Expression language for conditions — functions, variables, and reference.
Explore broader automation options for cases.
Read how parent and child statuses work in Penbox.
Validate behavior on a live case.