> ## Documentation Index
> Fetch the complete documentation index at: https://docs.penbox.io/llms.txt
> Use this file to discover all available pages before exploring further.
# Send a client update campaign
> Send mass client file update requests to your Brio clients via Penbox, using Brio export files and Penbox Campaigns.
**Goal:** Send a mass client file update request to your clients listed in Brio, from Penbox, and based on Brio export files.
This guide walks you through every step needed to send bulk client update requests to your clients.
***
## Part 1: Generate your export files from Brio
You need to produce two export files from Brio: one for your clients and one for your contracts. Download the two command files below first, then follow the steps for each one.
| Export | Command file |
| ---------------- | ----------------------------------------------------------------------------------------------------------------------- |
| Client listing | [Export listing clients v1.0.bsr](https://storage.googleapis.com/pnbx-cdn/brio/Export%20listing%20clients%20v1.0.bsr) |
| Contract listing | [Export listing contrats v1.0.bsr](https://storage.googleapis.com/pnbx-cdn/brio/Export%20listing%20contrats%20v1.0.bsr) |
Repeat the following steps once for the client .bsr file, then once more for the contract .bsr file.
Open Brio.
Click **Sélections → Sélection et rapport** (or **Selectie → Selectie en rapporten**).
Drag and drop the `.bsr` command file into the **Structure** panel on the left side of the screen.
Click **Exécuter sélection** / **Selectie uitvoeren** and wait for the selection to complete.
Once the operation has finished, click **OK**.
Click **Exporter le résultat** / **Resultaat exporteren**, then choose **Excel file**. Your export file is ready.
Repeat the steps above with the second `.bsr` file to generate your second export.
In your **client export file**, make sure every mobile number respects the following rules:
* One mobile number per field
* In one of these formats: `00324…` · `+324…` · `04…`
***
## Part 2: Set up in Penbox
Open your Penbox workspace.
Navigate to **Templates → Forms** (or **Sjablonen → Formulieren**) and confirm that the **"Mise à jour de la fiche client" / "Klantenbestand update"** form template is present in your workspace.
If you don't see this form template, contact Penbox so they can install it in your workspace.
***
## Part 3: Create and configure the campaign
Click **Campaigns** in the left-hand navigation.
Click **Create a campaign**.
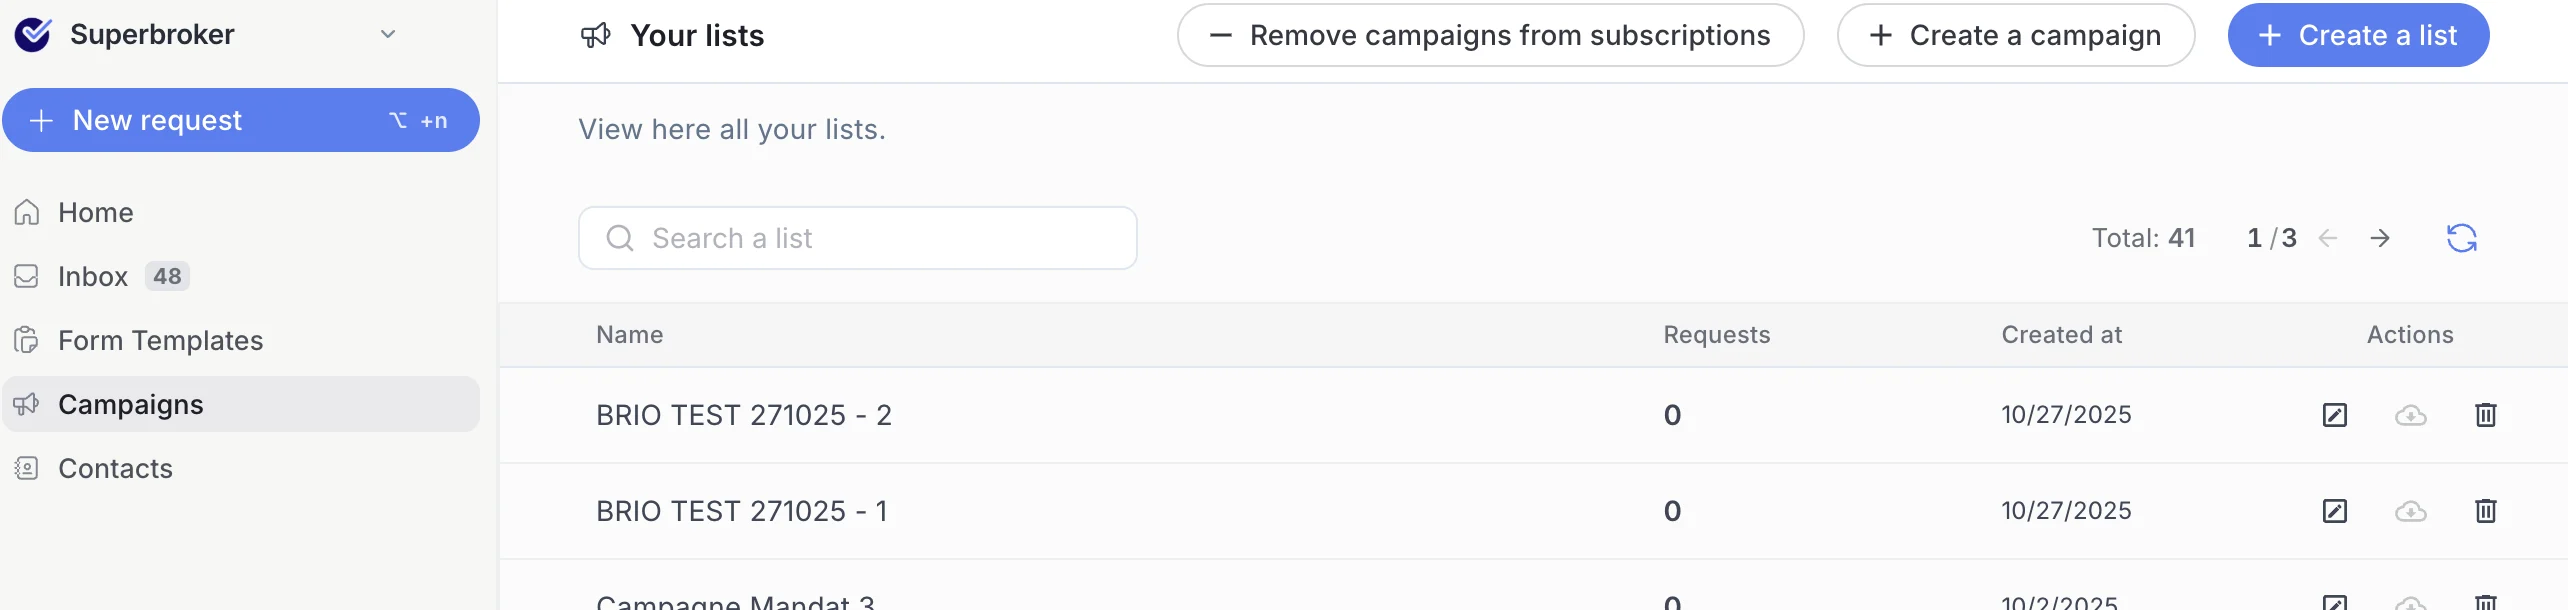 Give your campaign a clear, recognisable name.
Click **Add data**.
Give your campaign a clear, recognisable name.
Click **Add data**.
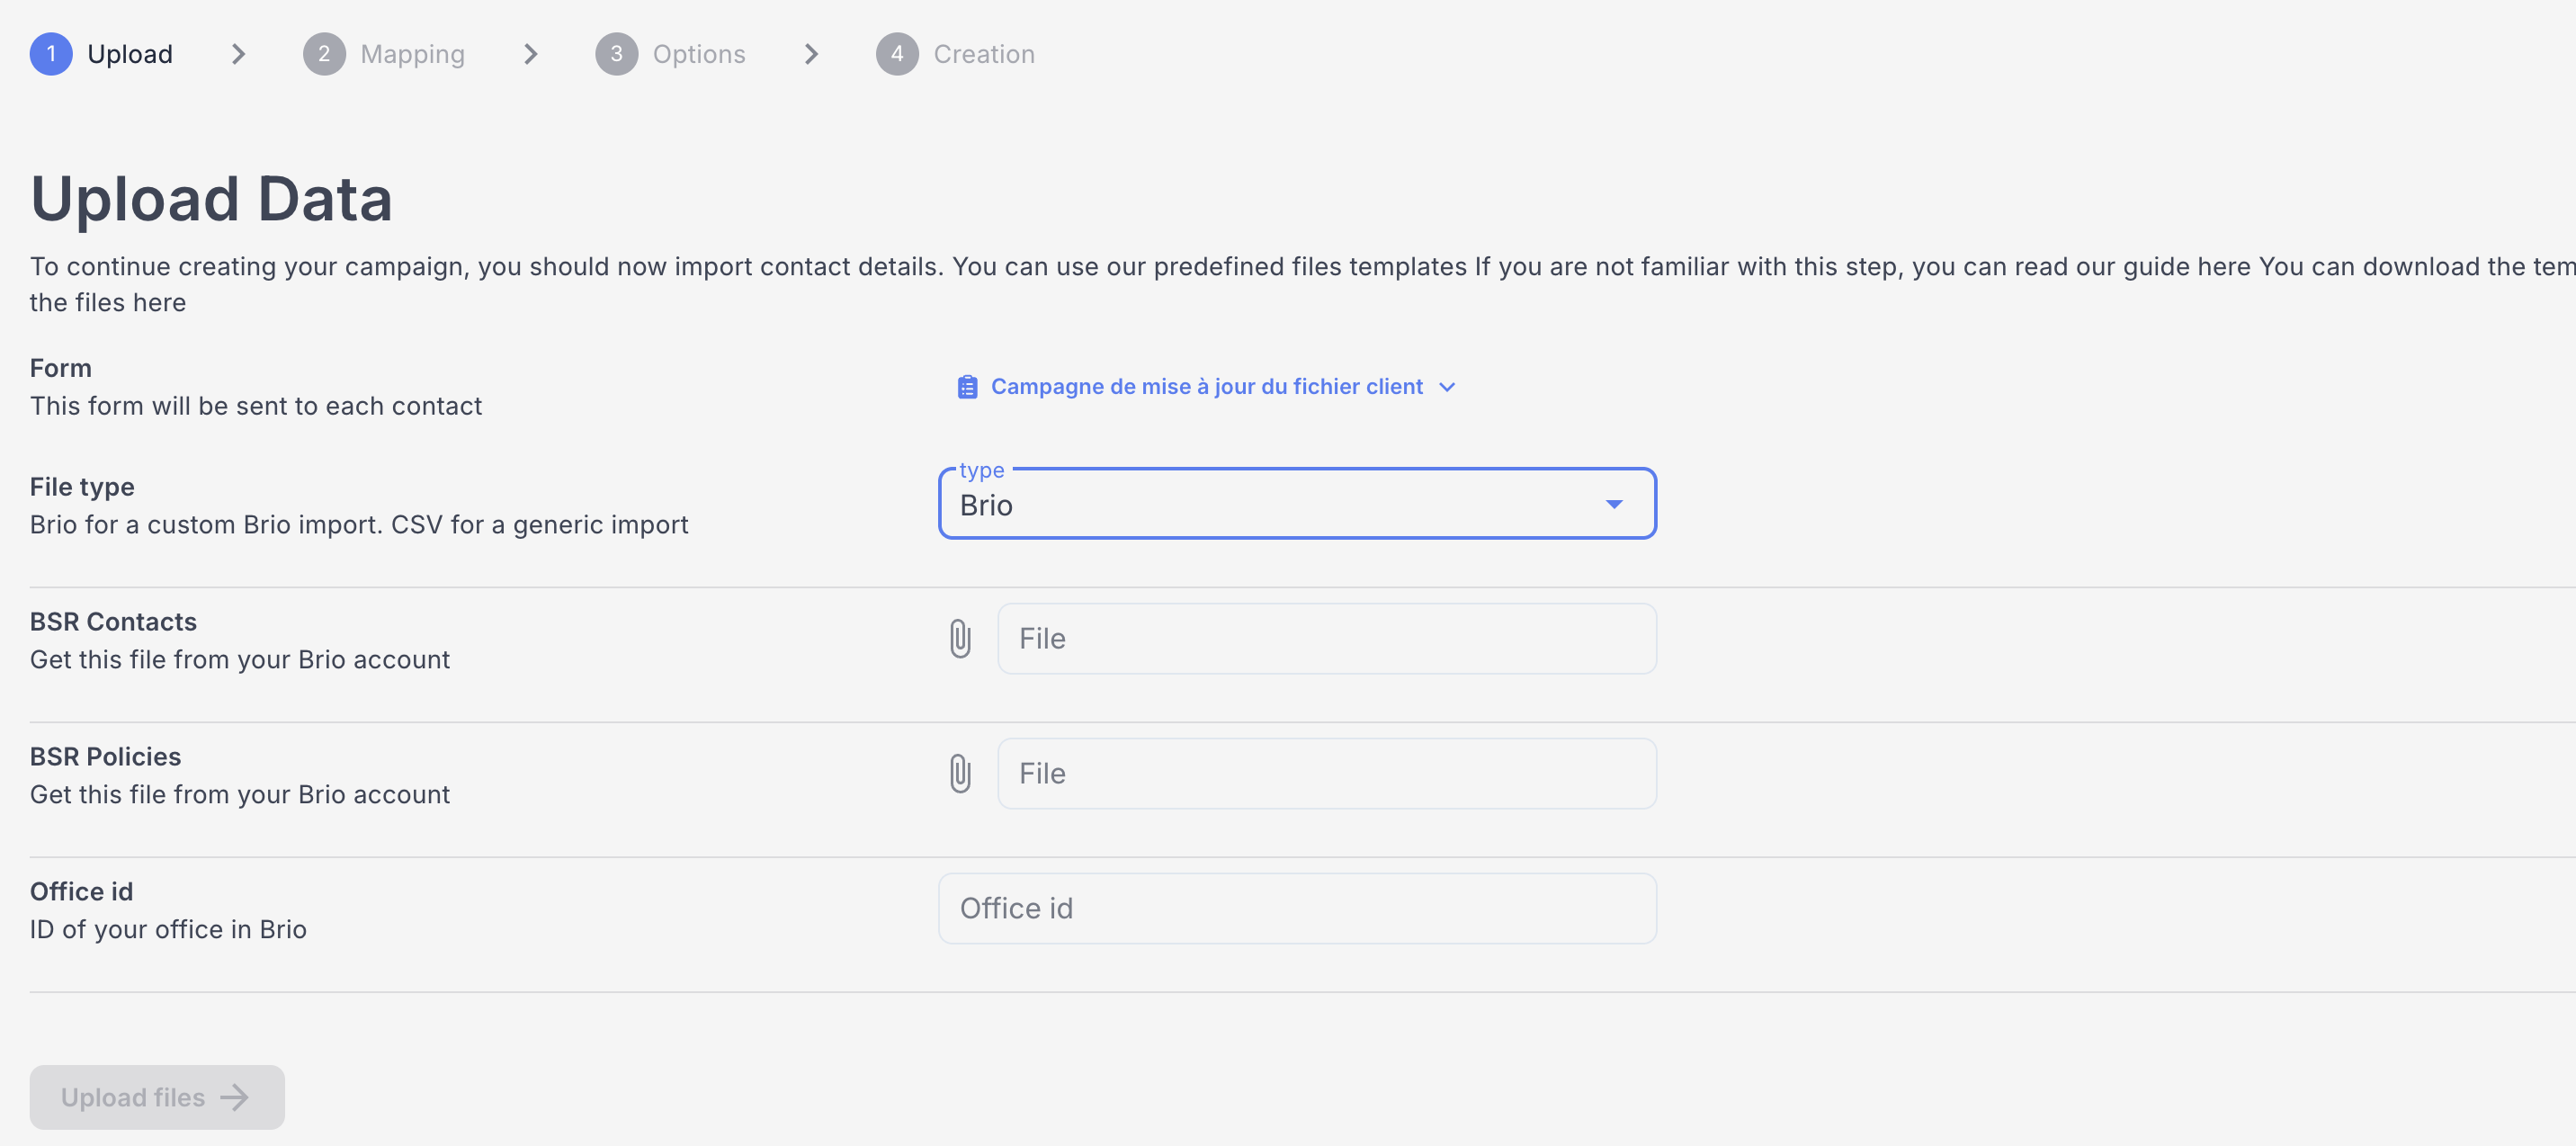
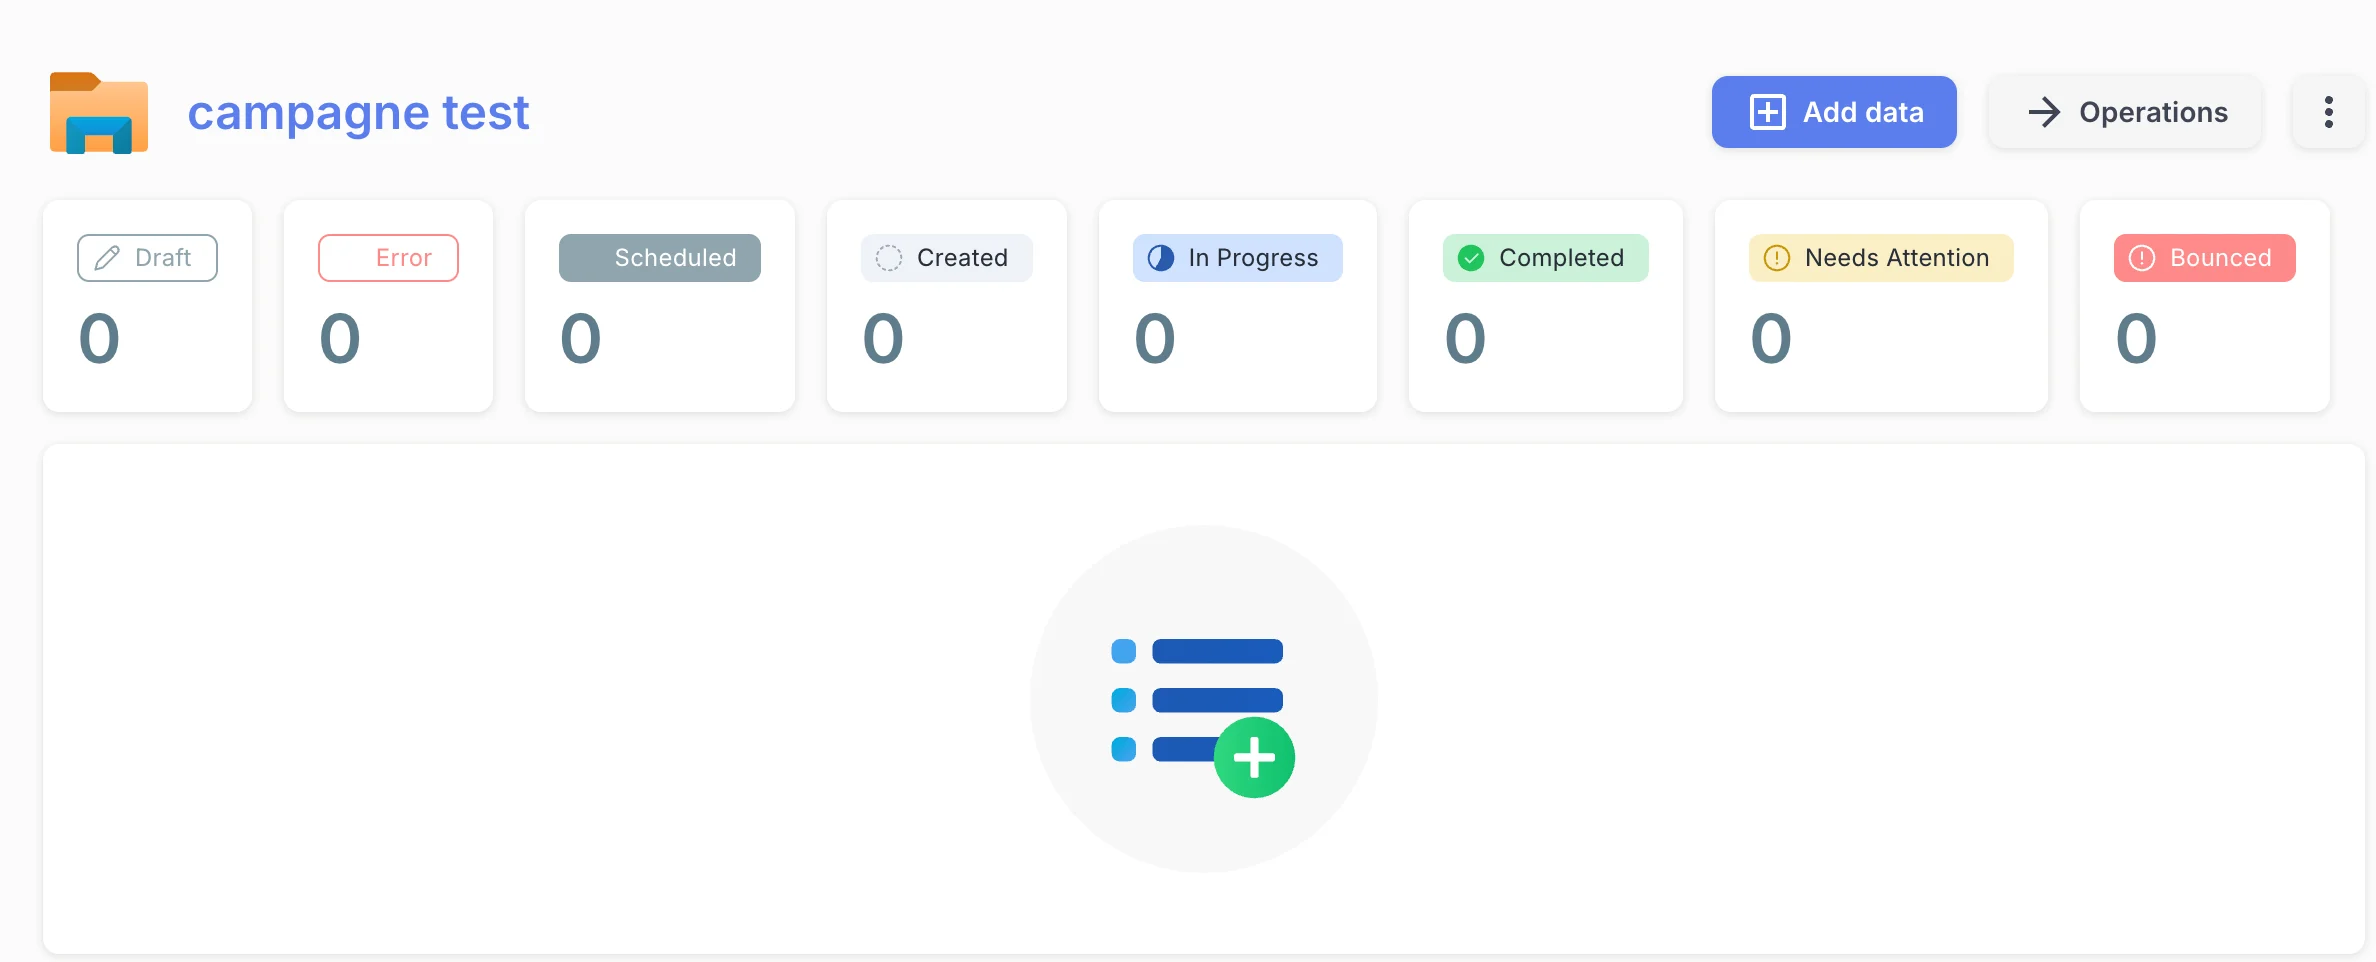 Choose the form you want to send in bulk — in this case, select **"Mise à jour de la fiche client"**.
Choose **Brio** as the file type.
Upload the two export files you generated from Brio:
* Your **client export**
* Your **contract export**
Fill in your Brio number in the field provided.
Click **Upload files**.
Choose the form you want to send in bulk — in this case, select **"Mise à jour de la fiche client"**.
Choose **Brio** as the file type.
Upload the two export files you generated from Brio:
* Your **client export**
* Your **contract export**
Fill in your Brio number in the field provided.
Click **Upload files**.
 Review the mapping screen that appears and confirm that all fields have been imported correctly.
Click **Validate mapping**.
You will now see a preview of the individual forms that will be sent. Take a moment to check the content of a few.
Click **Validate options**.
Click **Start creation** to generate all the individual forms. This may take a moment.
***
## Part 4: Schedule your sends
Once the forms are created, click **Schedule** to define when and how sends go out.
Fill in the following options:
* **Sends per wave** — how many forms go out per batch
* **Start date** — when sending should begin
* **Send time** — the time of day for each wave
* **Send days** — the days of the week on which sends happen
**Example:** 3 sends per day · send days: Monday and Wednesday · send time: 11:00 AM → 3 forms will go out every Monday and Wednesday at 11 AM.
Click **Start scheduling**. This may take a moment.
***
## You're done 🎉
Your campaign is created and your sends are scheduled. Well done!
***
## What's next?
Learn how to trigger a single client-file update from Brio and import the response back.
Configure the invitation and reminder emails your clients receive.
Review the mapping screen that appears and confirm that all fields have been imported correctly.
Click **Validate mapping**.
You will now see a preview of the individual forms that will be sent. Take a moment to check the content of a few.
Click **Validate options**.
Click **Start creation** to generate all the individual forms. This may take a moment.
***
## Part 4: Schedule your sends
Once the forms are created, click **Schedule** to define when and how sends go out.
Fill in the following options:
* **Sends per wave** — how many forms go out per batch
* **Start date** — when sending should begin
* **Send time** — the time of day for each wave
* **Send days** — the days of the week on which sends happen
**Example:** 3 sends per day · send days: Monday and Wednesday · send time: 11:00 AM → 3 forms will go out every Monday and Wednesday at 11 AM.
Click **Start scheduling**. This may take a moment.
***
## You're done 🎉
Your campaign is created and your sends are scheduled. Well done!
***
## What's next?
Learn how to trigger a single client-file update from Brio and import the response back.
Configure the invitation and reminder emails your clients receive.