> ## Documentation Index
> Fetch the complete documentation index at: https://docs.penbox.io/llms.txt
> Use this file to discover all available pages before exploring further.
# How to send and receive a client update starting from Brio
> Broker guide: trigger a Penbox client-data update from Brio and write the verified result back to your Brio record — no manual re-keying.
As a broker working in **Brio**, you can send a client a form to verify and update their client file, then import their response straight back into the Brio record — no copy-pasting and no chasing missing details by email.
This guide covers the full round-trip for an individual (*particulier*) client file: sending the update form from Brio, and integrating the response once the client has completed it.
## Watch the walkthrough
Prefer to watch first? Pick your language.
***
## What you'll build
By the end, you will have run a complete client-update round-trip that:
* **Sends an update form** to an individual client directly from their Brio client file
* Invites the client (with reminders, where appropriate) to **verify, complete, or correct** their information through a questionnaire
* **Imports the response back into Brio**, letting you choose field by field which new values to keep
**Estimated time:** 5 minutes
***
## Send a client-update form
Go to **Brio** and search for the client you want to send a client-file update form to.
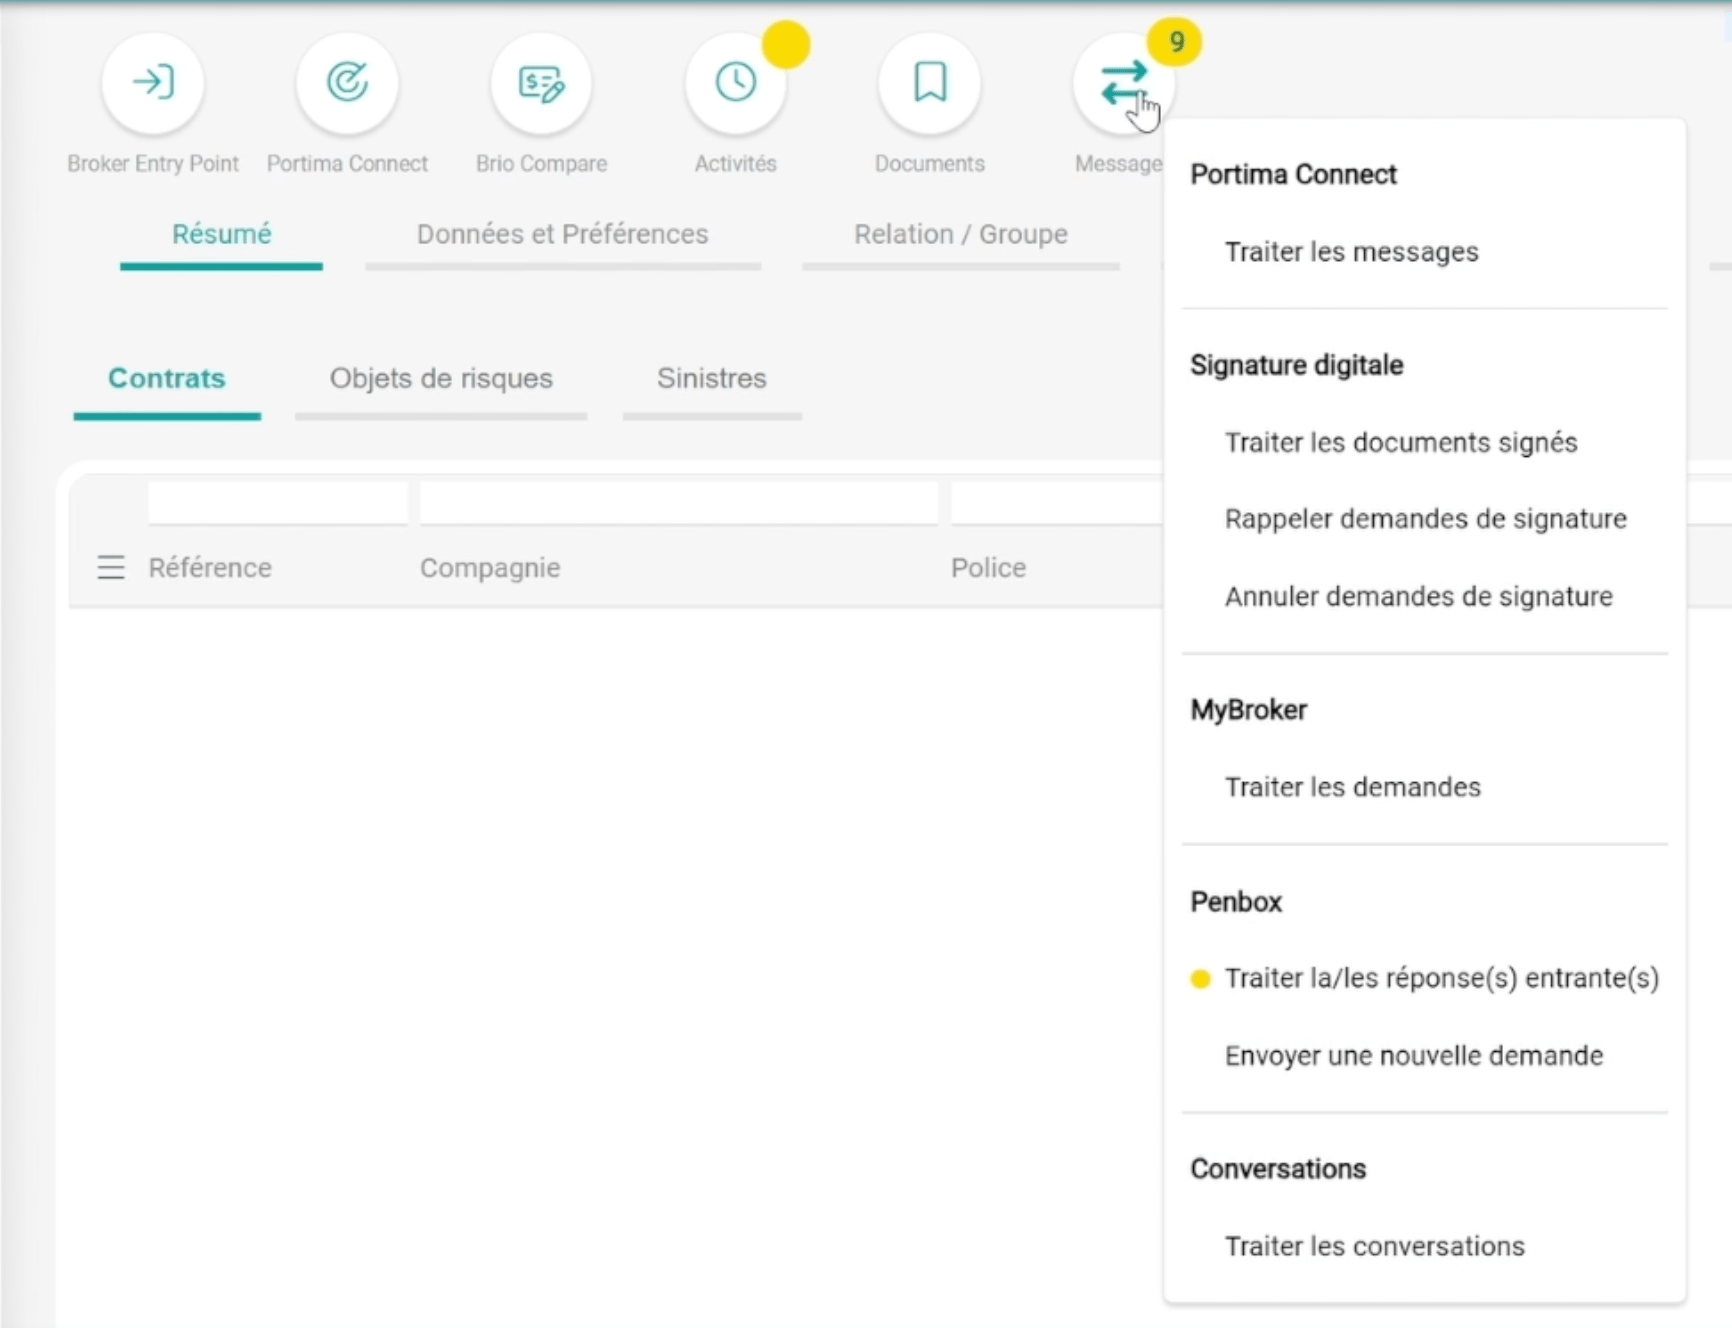
Once you are on the client file, click the two arrows — **Messages** / **Berichten**.
Click **envoyer une nouvelle demande** / **nieuw aanvraag versturen**.
 You will see the contact details of the person the update form will be sent to. Confirm they are correct before sending.
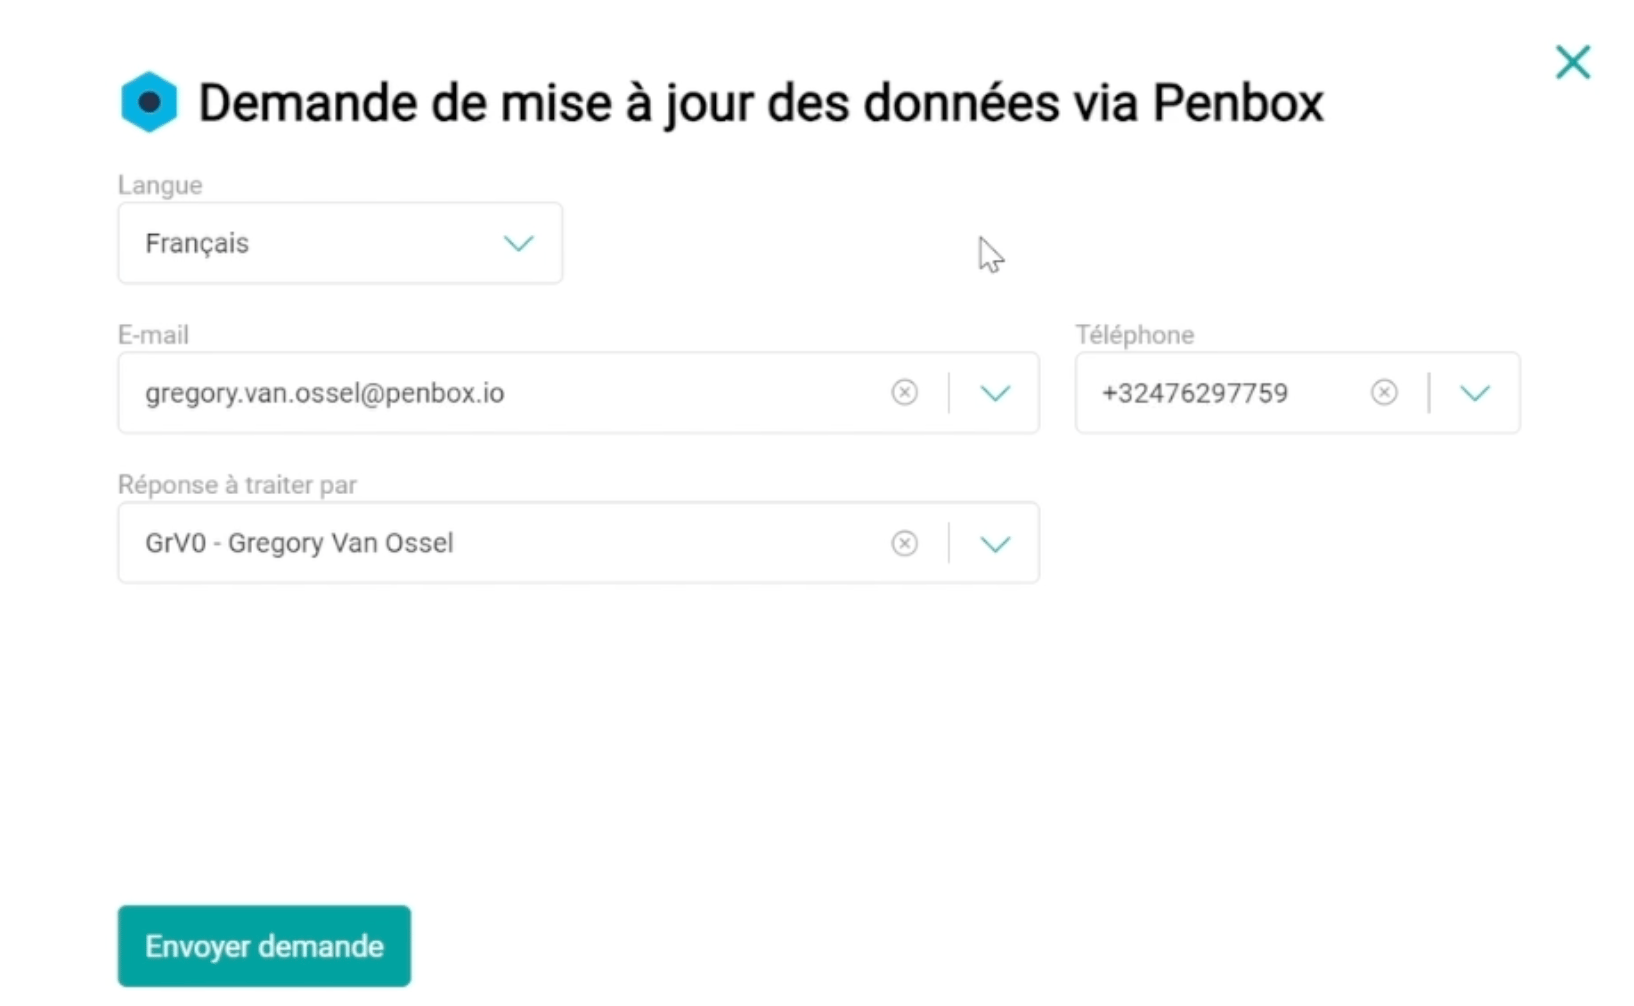 Click **envoyer demande** / **aanvraag versturen**.
Your client then receives an invitation — and reminders, where appropriate — inviting them to complete a questionnaire to verify, complete, or modify their client information.
***
## Integrate the client's response
Once the client has completed their client-file update, import the response into Brio.
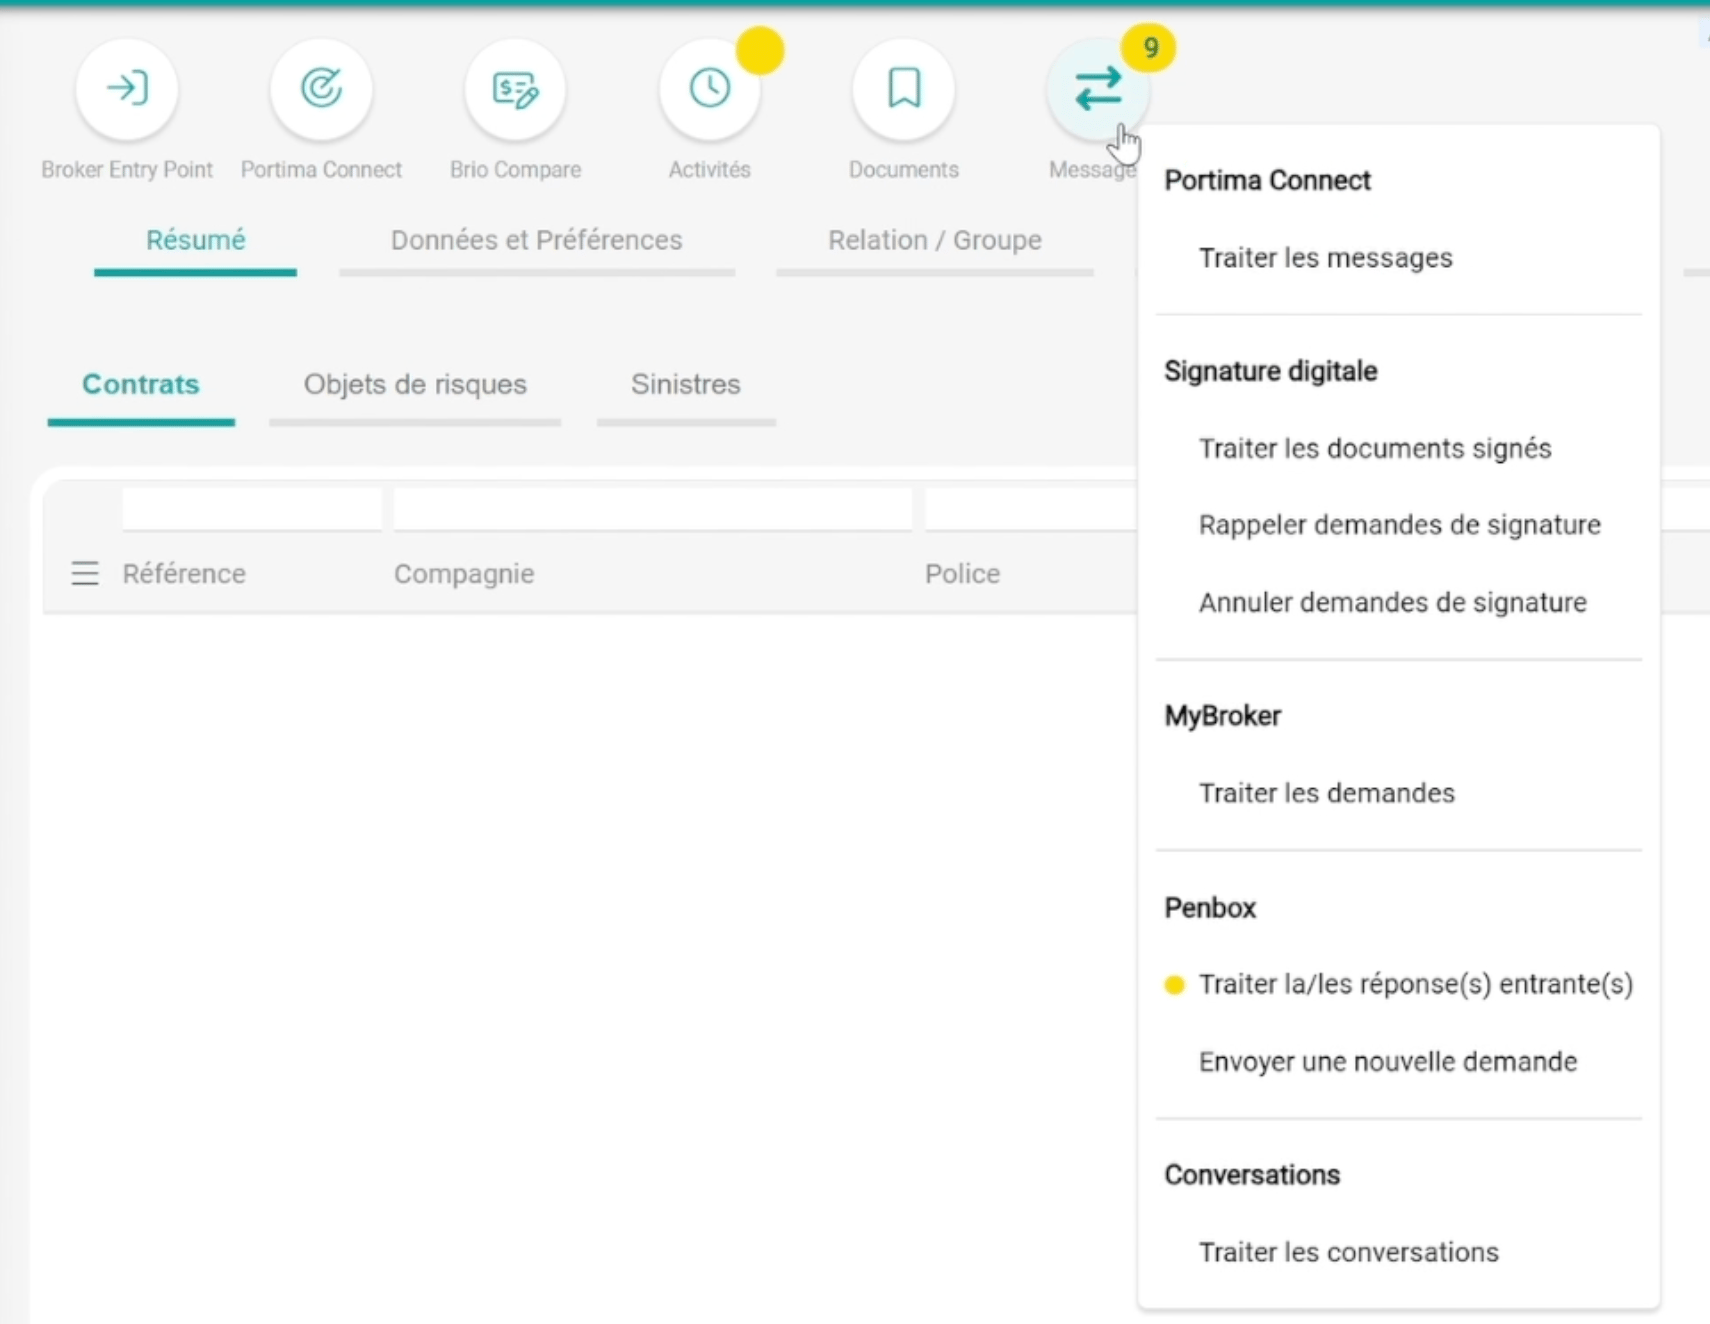
Go to **Brio** and click the two arrows — **Messages** / **Berichten**.
Click **traiter la / les réponse(s) entrante(s)** / **binnengekomen antwoord(en) behandelen**. You will then see all the responses that have come in.
Click **envoyer demande** / **aanvraag versturen**.
Your client then receives an invitation — and reminders, where appropriate — inviting them to complete a questionnaire to verify, complete, or modify their client information.
***
## Integrate the client's response
Once the client has completed their client-file update, import the response into Brio.
Go to **Brio** and click the two arrows — **Messages** / **Berichten**.
Click **traiter la / les réponse(s) entrante(s)** / **binnengekomen antwoord(en) behandelen**. You will then see all the responses that have come in.
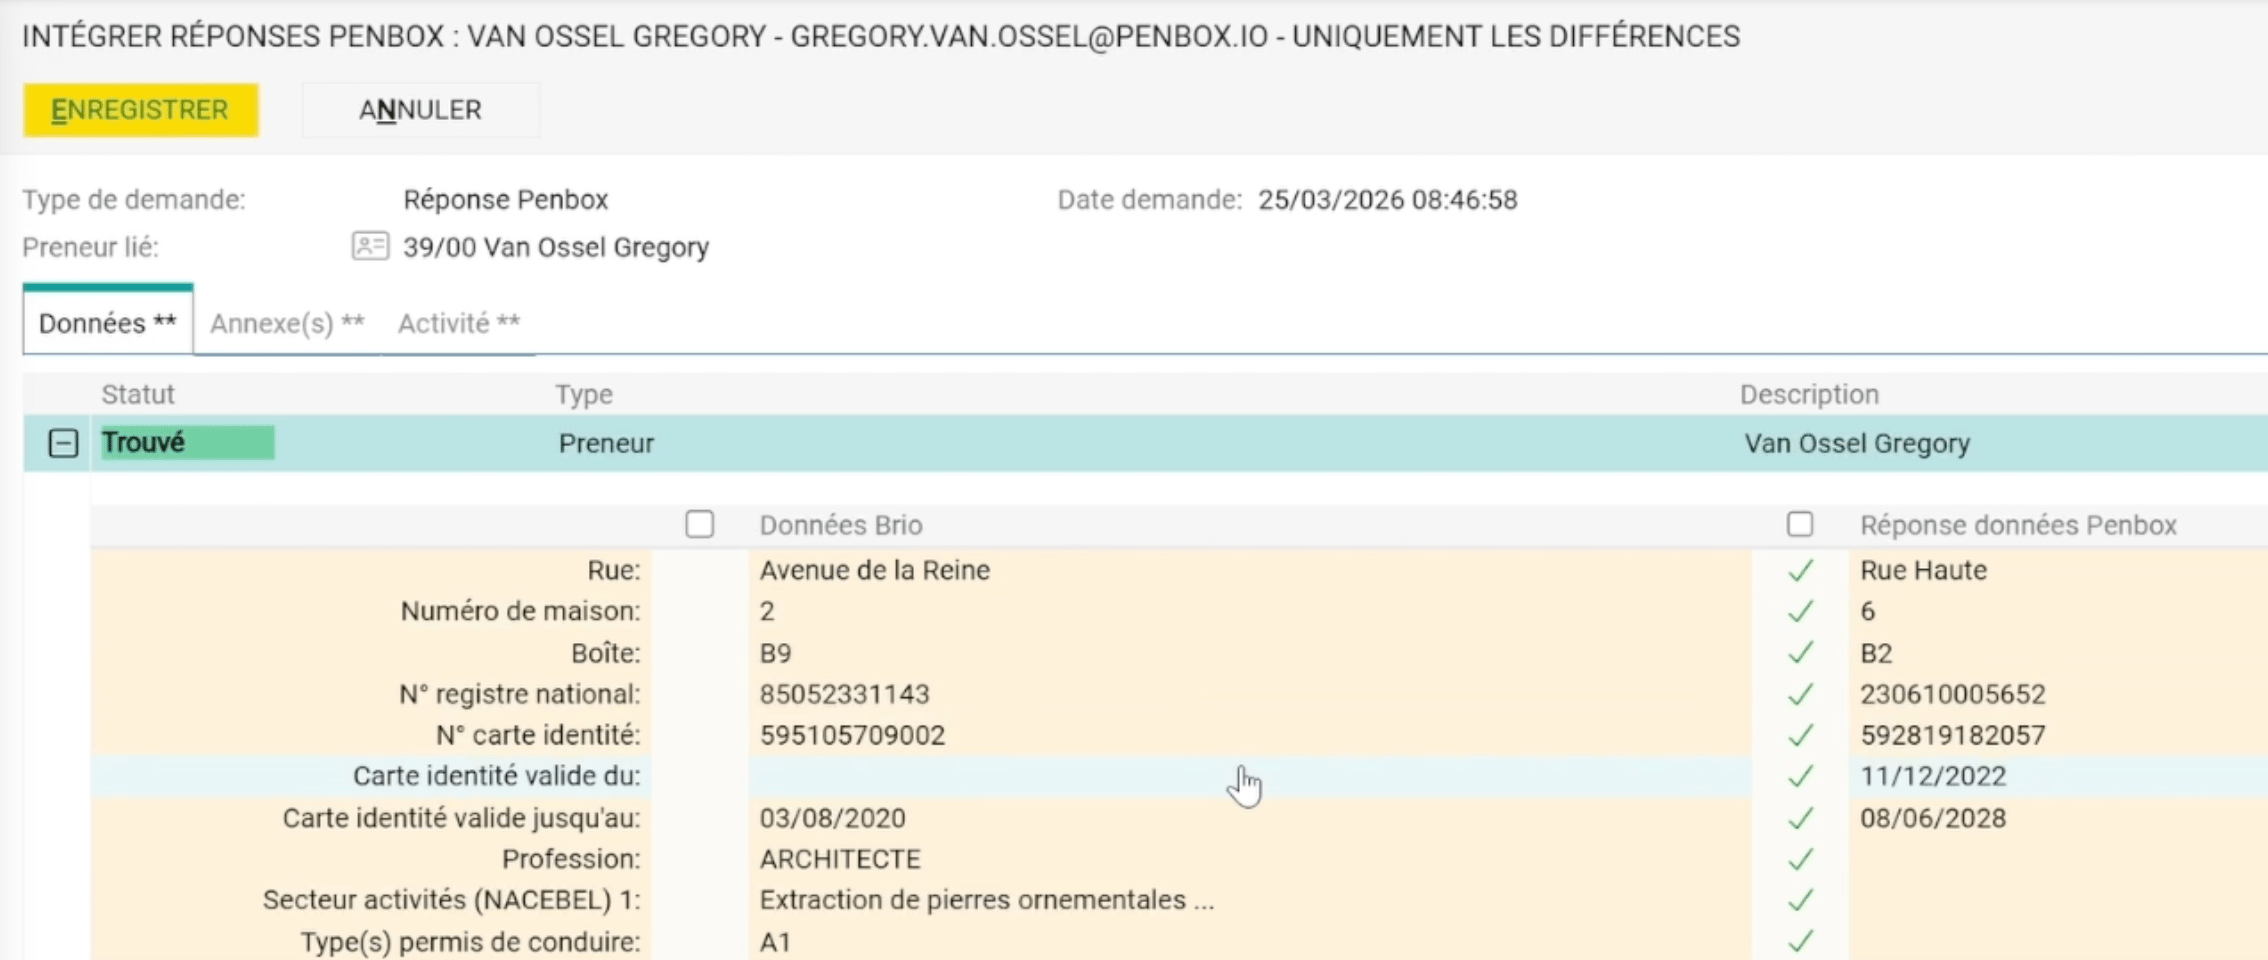
 Click the response you want to integrate.
You will see a page with the **original Brio values on the left** and the **new values submitted through the update form on the right**. Select the responses you want to import — and leave out the ones you don't.
Click **enregistrer** / **opslaan** to write the selected values back into the Brio client file.
Click the response you want to integrate.
You will see a page with the **original Brio values on the left** and the **new values submitted through the update form on the right**. Select the responses you want to import — and leave out the ones you don't.
Click **enregistrer** / **opslaan** to write the selected values back into the Brio client file.
 ***
## You're done
You've sent a client-file update form from Brio to a client, and integrated their response back into the Brio record — keeping the client file current with no manual re-keying.
***
## What's next?
Design the questionnaire clients fill in to update their file.
Configure the invitation and reminders clients receive.
***
## You're done
You've sent a client-file update form from Brio to a client, and integrated their response back into the Brio record — keeping the client file current with no manual re-keying.
***
## What's next?
Design the questionnaire clients fill in to update their file.
Configure the invitation and reminders clients receive.