> ## Documentation Index
> Fetch the complete documentation index at: https://docs.penbox.io/llms.txt
> Use this file to discover all available pages before exploring further.
# Build Your First Case Template
> Create a case template to collect information from a new employee — in 5 to 10 minutes.
Get up and running in minutes — this guide walks you through creating a case template to collect information from a new employee.
## What you'll build
By the end of this guide, you'll have a ready-to-use case template that:
* Sends a form to your new employee to collect their personal details
* Automatically follows up with a welcome email
**Estimated time:** 5–10 minutes
***
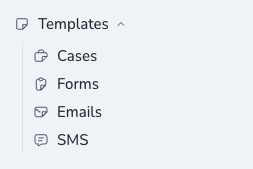
Head over to your Penbox workspace and click **Templates** in the sidebar, then select **Cases**.
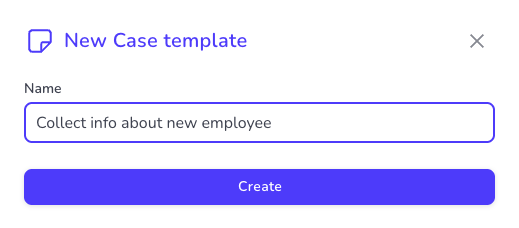
 Click **+ New template**, give it a name (for example, *Collect info about new employee*), and hit **Create**.
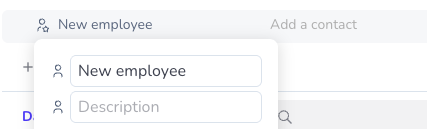
 Every case has a main contact — the person you'll be communicating with. In this scenario, that's your new employee.
1. Click on **Main Contact** to rename it.
2. Change the name to **New employee**.
This label will appear throughout the case, so pick something that makes it easy to understand at a glance.
Every case has a main contact — the person you'll be communicating with. In this scenario, that's your new employee.
1. Click on **Main Contact** to rename it.
2. Change the name to **New employee**.
This label will appear throughout the case, so pick something that makes it easy to understand at a glance.

 Now let's define the information you need to collect. For a new employee, you'll typically need six data points:
| Data field | Data type |
| ---------------------- | --------- |
| Birth date | Date |
| Start date | Date |
| Street name | Text |
| City | Text |
| Zip code | Text |
| Driving license number | Text |
Here's how to add them:
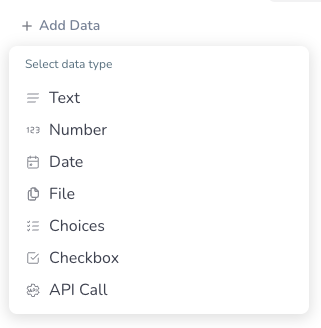
1. Click **+ Add Data**.
2. Select the appropriate data type (e.g., *Date* for Birth date).
Now let's define the information you need to collect. For a new employee, you'll typically need six data points:
| Data field | Data type |
| ---------------------- | --------- |
| Birth date | Date |
| Start date | Date |
| Street name | Text |
| City | Text |
| Zip code | Text |
| Driving license number | Text |
Here's how to add them:
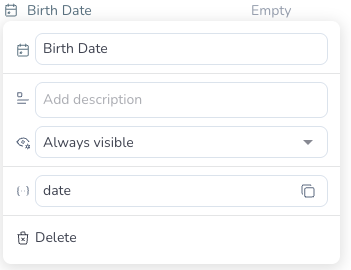
1. Click **+ Add Data**.
2. Select the appropriate data type (e.g., *Date* for Birth date).
 3. Click on the new field's name and rename it (e.g., *Birth date*).
 4. Repeat for each data point.
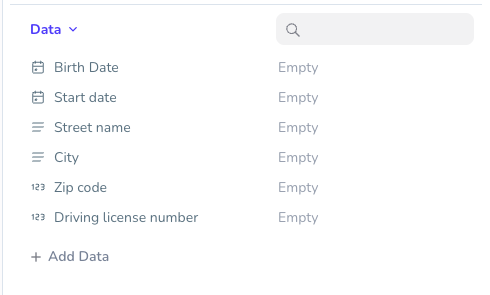 Need to collect something extra later? Just click **+ Add Data** at any time to add more fields — your template is flexible.
Time to set up the communication flow. Your first step will send an email with a form so your new employee can fill in their details.
1. Select the six data points you just created.
2. Click **Ask with form**.
Need to collect something extra later? Just click **+ Add Data** at any time to add more fields — your template is flexible.
Time to set up the communication flow. Your first step will send an email with a form so your new employee can fill in their details.
1. Select the six data points you just created.
2. Click **Ask with form**.
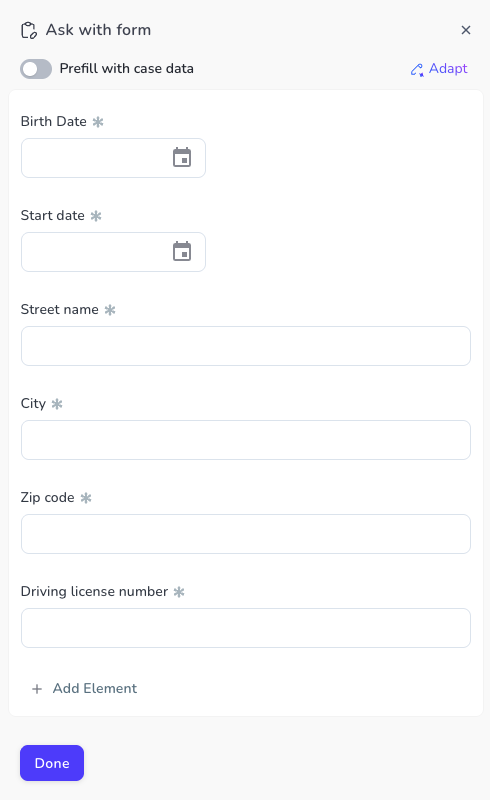
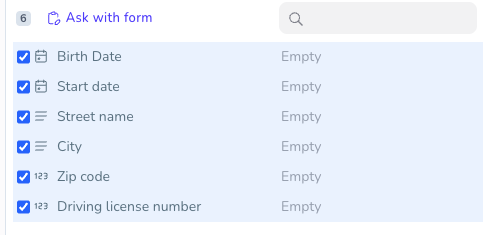 3. Review the form preview to make sure all the right fields are included, then click **Done**.
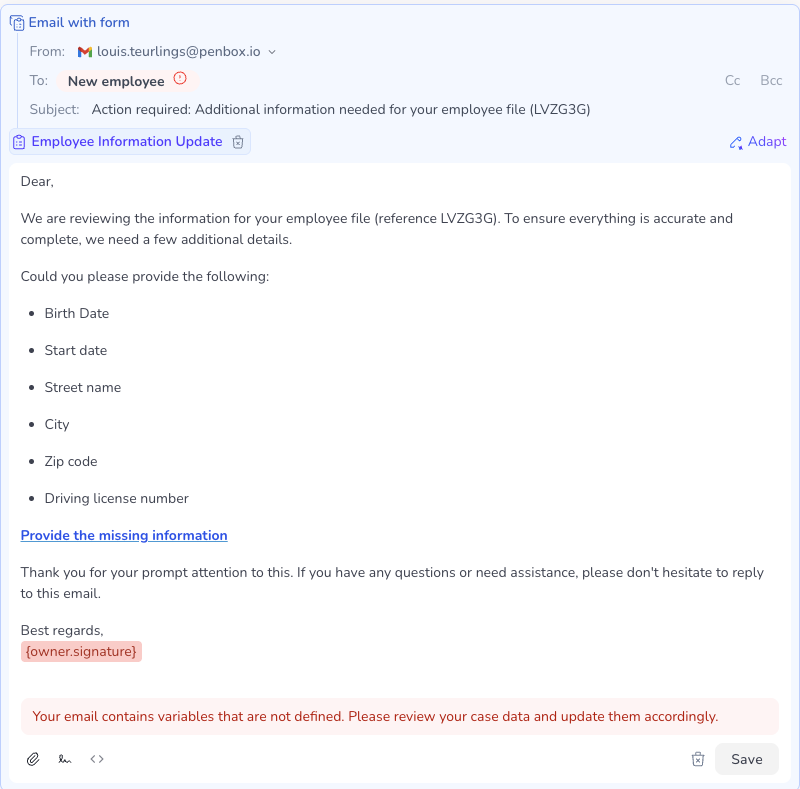
 4. Penbox's AI will automatically generate an email inviting your new employee to fill out the form. Review the email content, tweak it if needed, and click **Save**.
 Now let's add a follow-up email to thank your new employee and welcome them aboard.
1. Click **Email**.
Now let's add a follow-up email to thank your new employee and welcome them aboard.
1. Click **Email**.
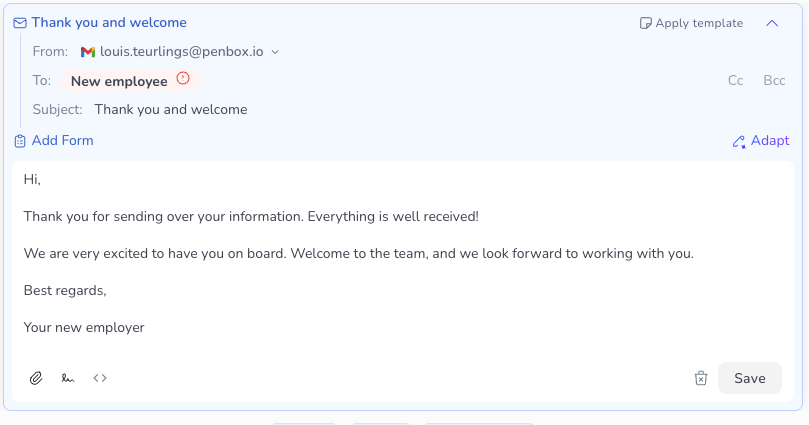
 2. Click on the email subject line and change it to something like **Thank you and welcome**.
3. Write a friendly welcome message in the email body.
4. Click **Save**.
2. Click on the email subject line and change it to something like **Thank you and welcome**.
3. Write a friendly welcome message in the email body.
4. Click **Save**.
 ***
## You're all set!
Your case template now has two steps:
1. **Step 1** — An email with a form to collect your new employee's information
2. **Step 2** — A welcome email to thank them and say hello
The template is ready to use. Next time you onboard someone, just create a new case from this template and Penbox will handle the rest.
***
## What's next?
Put your template to work — launch a case, collect data, and close it in minutes.
Add more steps, attach documents, or include additional data fields as your onboarding process evolves.
Case templates work for any multi-step data collection workflow, not just onboarding.
***
## You're all set!
Your case template now has two steps:
1. **Step 1** — An email with a form to collect your new employee's information
2. **Step 2** — A welcome email to thank them and say hello
The template is ready to use. Next time you onboard someone, just create a new case from this template and Penbox will handle the rest.
***
## What's next?
Put your template to work — launch a case, collect data, and close it in minutes.
Add more steps, attach documents, or include additional data fields as your onboarding process evolves.
Case templates work for any multi-step data collection workflow, not just onboarding.