> ## Documentation Index
> Fetch the complete documentation index at: https://docs.penbox.io/llms.txt
> Use this file to discover all available pages before exploring further.
# Configure statuses in a case template
> Add and rename child statuses under Draft, Pending, In Progress, Closed, and Cancelled so your team sees where each case stands — worked example: Collect info about new employee.
Well-configured **statuses** make cases legible at a glance: everyone sees which phase a case is in and what still needs to happen. This guide opens a **case template**, goes to **Case settings**, and adjusts **child statuses** under each parent category.
The worked example uses the template **Collect info about new employee**; the same steps apply to any case template.
## What you'll build
When you finish, your **case template** will have **child statuses** that match how your team works — for example, multiple steps under **In Progress** instead of a single generic label. You will have:
* Opened **Statuses** from the template’s **settings**
* Either **renamed** existing child statuses or **added** new ones with **+** next to a parent
* **Saved** the lifecycle so new cases pick up the structure
**Estimated time:** 5–10 minutes
***
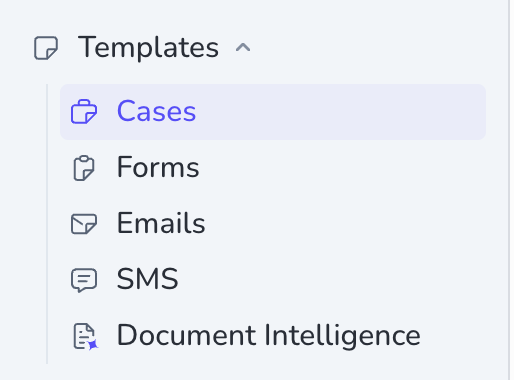
In the sidebar, expand **Templates**, then click **Cases**.
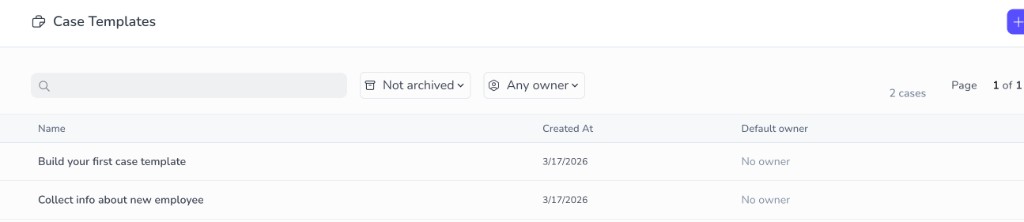
 Click the **case template** you want to configure — for this walkthrough, open **Collect info about new employee** (or your own template).
 In **Template Edition**, click the **settings** (gear) icon in the upper-right corner.
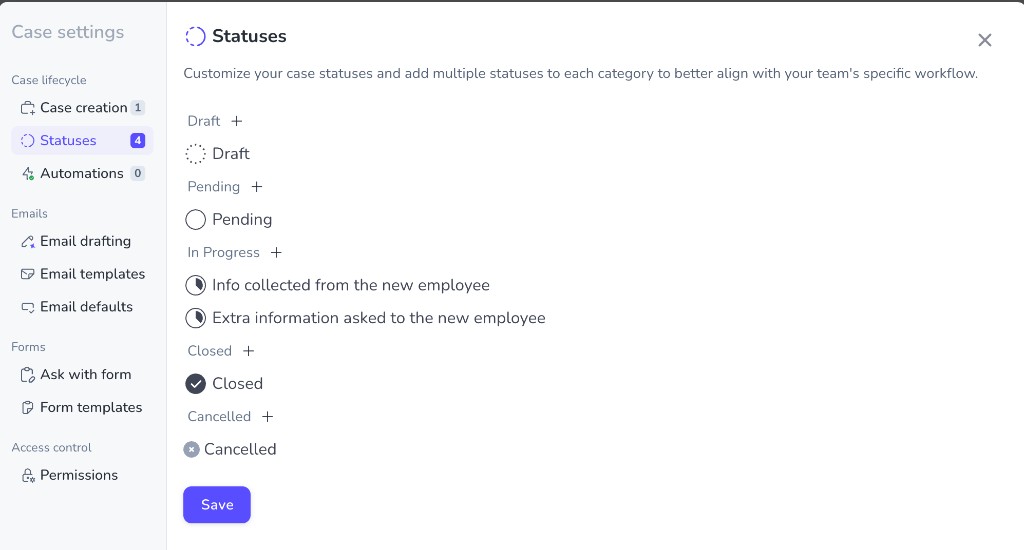
 In **Case settings**, under **Case lifecycle**, choose **Statuses**.
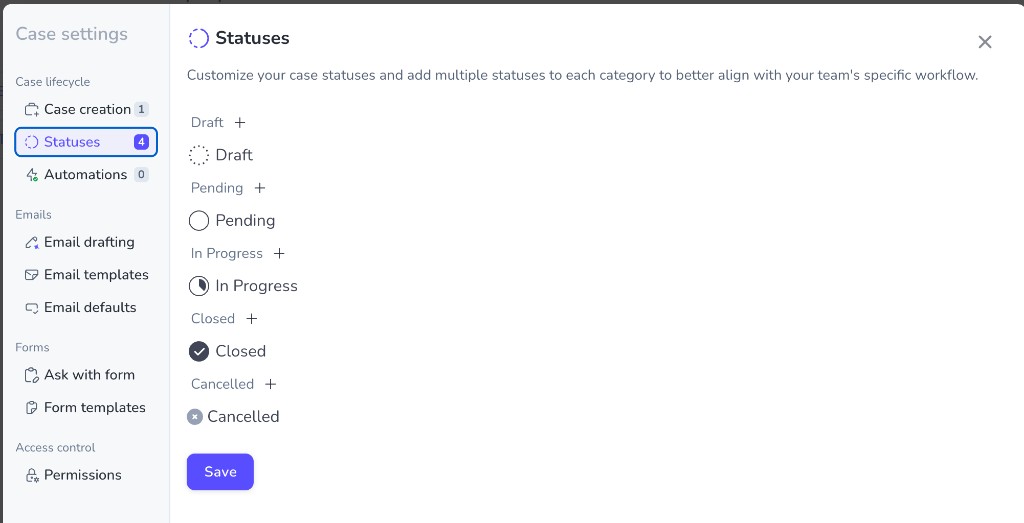 Penbox gives you **five parent statuses** — **Draft**, **Pending**, **In Progress**, **Closed**, and **Cancelled**. Each parent starts with **one** child status that shares its name. You refine the lifecycle by renaming those children or adding more under a parent.
**Rename an existing child status**
Click the **child** you want to change, then edit the **Label** field.
Penbox gives you **five parent statuses** — **Draft**, **Pending**, **In Progress**, **Closed**, and **Cancelled**. Each parent starts with **one** child status that shares its name. You refine the lifecycle by renaming those children or adding more under a parent.
**Rename an existing child status**
Click the **child** you want to change, then edit the **Label** field.
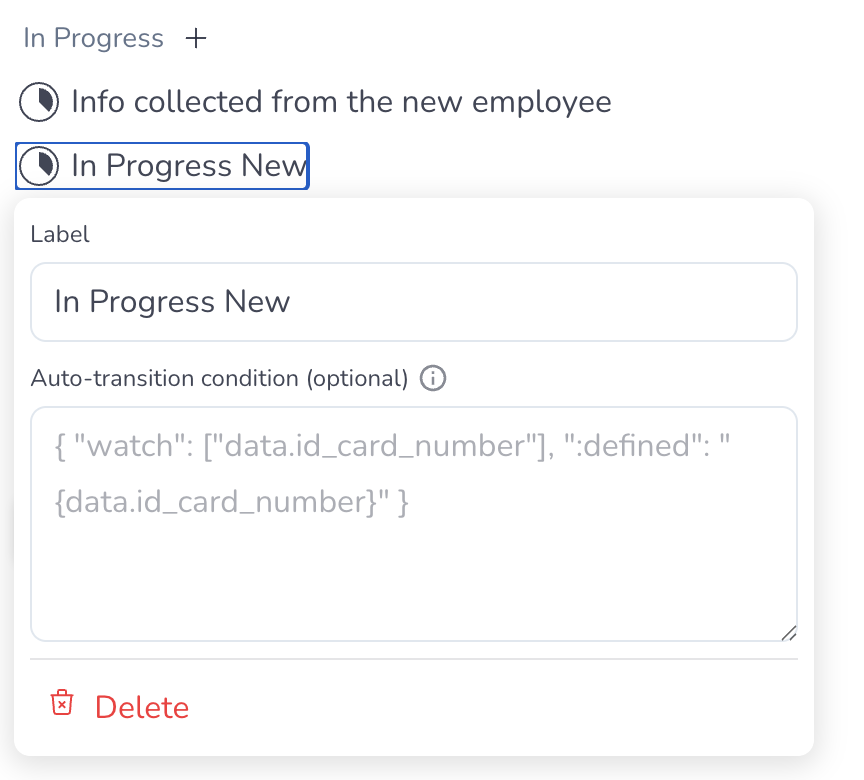
 **Add a new child status**
1. Click **+** beside the **parent** (for example **In Progress**).
2. Click the newly created child (it may appear with a default name such as **In Progress New**).
3. Update **Label** to the name your team should see.
**Add a new child status**
1. Click **+** beside the **parent** (for example **In Progress**).
2. Click the newly created child (it may appear with a default name such as **In Progress New**).
3. Update **Label** to the name your team should see.

 Click **Save** when the structure matches your process.
Here is one possible outcome for **Collect info about new employee**: under **In Progress**, two clear child statuses instead of one — for example **Info collected from the new employee** and **Extra information asked to the new employee**.
Click **Save** when the structure matches your process.
Here is one possible outcome for **Collect info about new employee**: under **In Progress**, two clear child statuses instead of one — for example **Info collected from the new employee** and **Extra information asked to the new employee**.
 ***
## You're done
Your **case template** now exposes **child statuses** that reflect how work actually moves. New cases still **start** in the first child under **Draft** by default. While a case is open, your team **changes status manually** from one value to the next unless you add automation elsewhere.
**Automatic status transitions** — when watched data or steps satisfy a condition — are covered in [Automatic case status transitions](/guides/automatic-case-transition). Use the **Auto-transition condition** field on each child status to add that logic.
***
## What's next?
Create a template from scratch if you are new to case templates.
Walk through a case end-to-end in the app.
Read how parent and child statuses fit the case lifecycle in Penbox.
Deep-dive on case templates in the main documentation.
***
## You're done
Your **case template** now exposes **child statuses** that reflect how work actually moves. New cases still **start** in the first child under **Draft** by default. While a case is open, your team **changes status manually** from one value to the next unless you add automation elsewhere.
**Automatic status transitions** — when watched data or steps satisfy a condition — are covered in [Automatic case status transitions](/guides/automatic-case-transition). Use the **Auto-transition condition** field on each child status to add that logic.
***
## What's next?
Create a template from scratch if you are new to case templates.
Walk through a case end-to-end in the app.
Read how parent and child statuses fit the case lifecycle in Penbox.
Deep-dive on case templates in the main documentation.