> ## Documentation Index
> Fetch the complete documentation index at: https://docs.penbox.io/llms.txt
> Use this file to discover all available pages before exploring further.
# Build your first Document Intelligence template
> Step through a complete Document Intelligence template using Penbox Intelligence — validation, typed extraction, and a live test, with a bank RIB as the worked example.
This guide walks you through building a **simple, production-ready Document Intelligence template** powered by **Penbox Intelligence**: natural-language validation, structured fields the model must respect, and an in-app test loop so you trust the output before anyone uploads a real file.
We use a **bank RIB** (*Relevé d'Identité Bancaire*) as the example document — the same pattern applies to invoices, IDs, contracts, or any PDF or image you need to understand at scale.
## What you'll build
When you finish, you will have a **fully functional Document Intelligence template** that:
* Uses **Penbox Intelligence** to **validate** uploads against criteria you write in plain language, so bad or irrelevant files are caught early
* **Extracts** a strict schema of **typed** values (text, number, date, or list) you can reuse in cases, forms, and automations — not loose blobs of text
* Ships with a **verified test run**: you have already seen validation, confidence, and field-level results on a real sample
**Estimated time:** 10–15 minutes
***
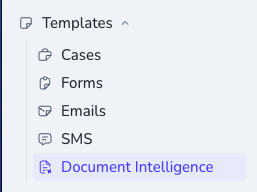
In your Penbox workspace, open **Templates** in the sidebar, then choose **Document Intelligence**.
 Click **+ New**.
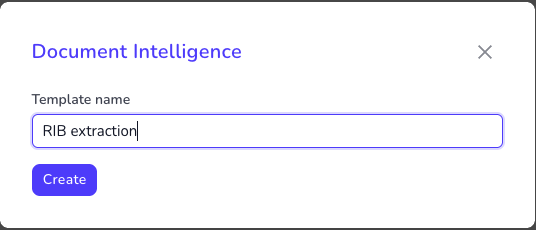
 Give your template a name that will read clearly in your workspace — for this example, use *RIB extraction* — then click **Create**.
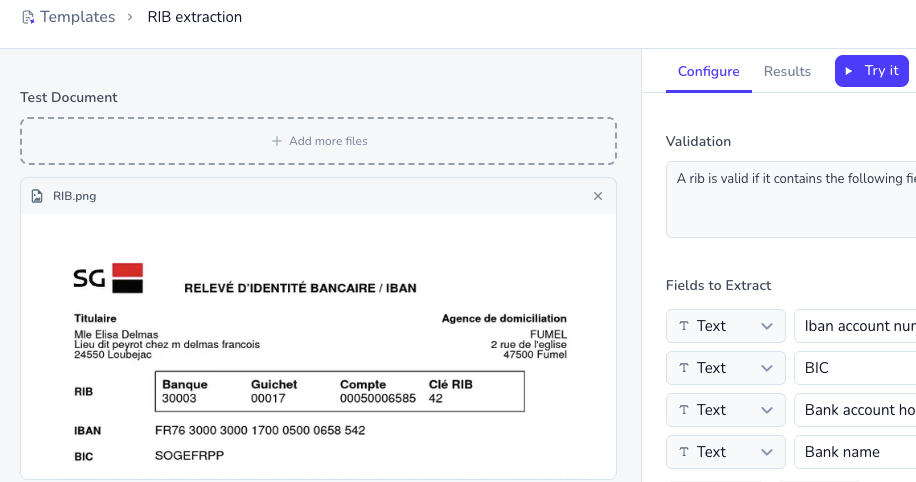
 The editor keeps **configuration** and **Try it** in one place, so you can define the template and prove it on a sample file without switching context.
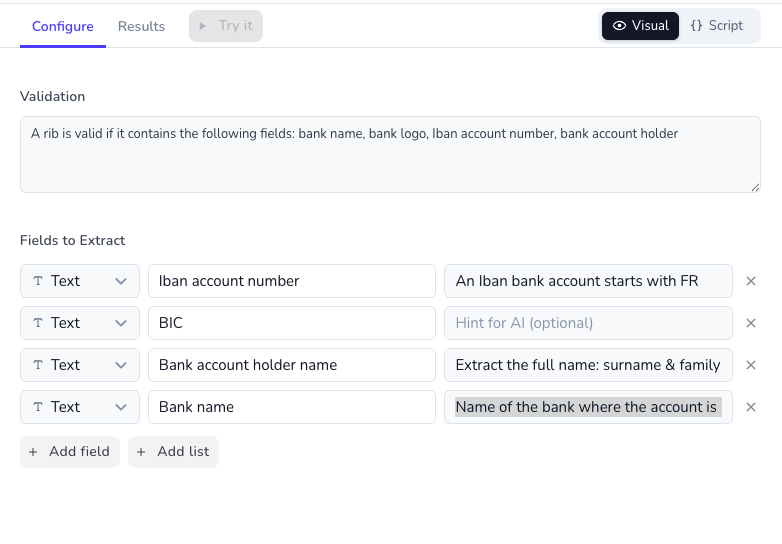
Under **Validation**, tell Penbox Intelligence what must be true for this document type. That grounds extraction: the model checks the file against your rules before you trust the fields.
For our RIB example, you might use:
*A RIB is valid if it contains the following fields: bank name, bank logo, IBAN account number, bank account holder.*
The editor keeps **configuration** and **Try it** in one place, so you can define the template and prove it on a sample file without switching context.
Under **Validation**, tell Penbox Intelligence what must be true for this document type. That grounds extraction: the model checks the file against your rules before you trust the fields.
For our RIB example, you might use:
*A RIB is valid if it contains the following fields: bank name, bank logo, IBAN account number, bank account holder.*
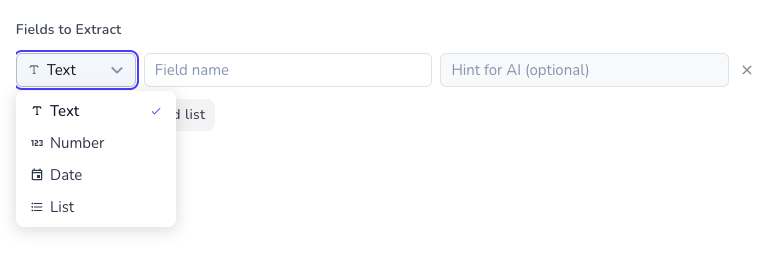
 Under **Fields to Extract**, click **+ Add field** for each value you want from the document.
 For each field:
1. **Choose a type** — **Text**, **Number**, **Date**, or **List**. Penbox Intelligence returns values in that shape, so downstream steps and APIs stay predictable.
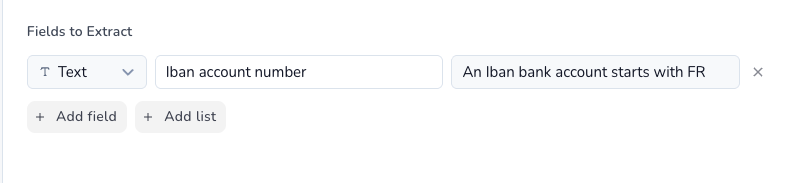
2. **Name the field** — mirror the wording on the document when you can (e.g. *IBAN account number*) so the model anchors on the right region.
3. **Add an optional hint** — steer the model when the layout is ambiguous (e.g. for French IBANs: *An IBAN bank account starts with FR*).
For each field:
1. **Choose a type** — **Text**, **Number**, **Date**, or **List**. Penbox Intelligence returns values in that shape, so downstream steps and APIs stay predictable.
2. **Name the field** — mirror the wording on the document when you can (e.g. *IBAN account number*) so the model anchors on the right region.
3. **Add an optional hint** — steer the model when the layout is ambiguous (e.g. for French IBANs: *An IBAN bank account starts with FR*).
 Repeat for every field your template must output. For the RIB walkthrough, add **four** text fields and hints like below — then open **Configure** and confirm the full schema matches what you want in production.
| Field | Type | Hint (example) |
| ------------------------ | ---- | ------------------------------------------------- |
| IBAN account number | Text | An IBAN bank account starts with FR |
| BIC | Text | *Optional* |
| Bank account holder name | Text | Extract the full name: given name and family name |
| Bank name | Text | Name of the bank where the account is hosted |
Repeat for every field your template must output. For the RIB walkthrough, add **four** text fields and hints like below — then open **Configure** and confirm the full schema matches what you want in production.
| Field | Type | Hint (example) |
| ------------------------ | ---- | ------------------------------------------------- |
| IBAN account number | Text | An IBAN bank account starts with FR |
| BIC | Text | *Optional* |
| Bank account holder name | Text | Extract the full name: given name and family name |
| Bank name | Text | Name of the bank where the account is hosted |
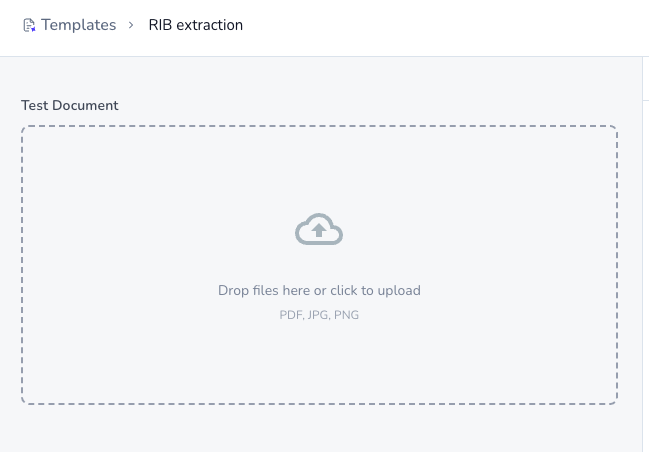
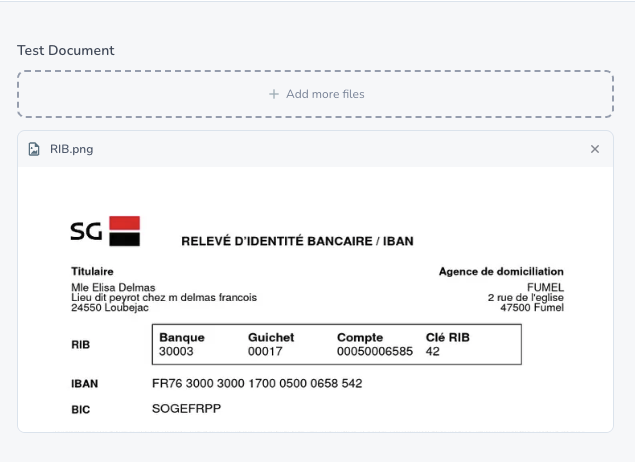
 On the left, under **Test Document**, upload a representative file (PDF, JPG, or PNG). Here we use a sample **RIB**; for your own template, pick a file that matches the document type you described in validation.
 With your test file in place, click **Try it** to run Penbox Intelligence end-to-end on that upload. After you tweak validation or fields, use **Retry** to re-run without leaving the editor.
 Open the **Results** tab: you get a validation verdict, image-quality signal, and each extracted value with confidence — the same signals your live flows can rely on once the template is attached to a **File** element.
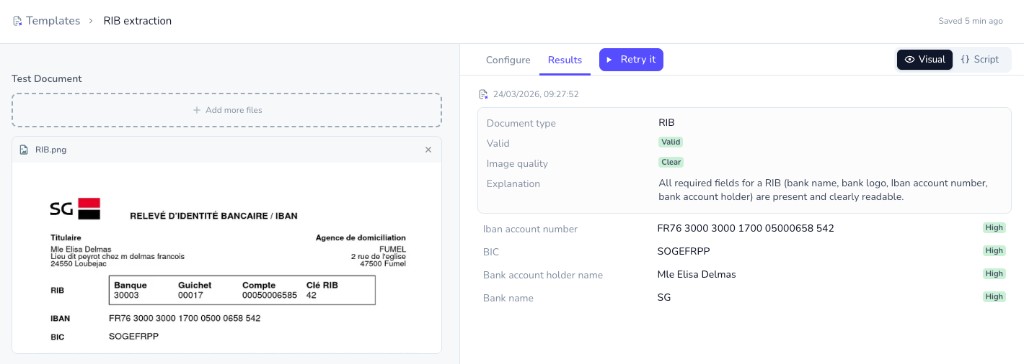 If the output matches the source document, your template is ready to ship. If not, iterate in **Configure** — tighter validation, clearer field names, and sharper hints usually close the gap in one or two cycles.
***
## You're done
You have built and battle-tested a **Document Intelligence** template on **Penbox Intelligence**: human-readable validation, a strict extraction schema, and proof from a real upload. Swap the RIB for any document class you need — the workflow is the same, and the template is ready to plug into your Penbox flows.
***
## What's next?
Create or update templates programmatically via Pen Connect.
See how Document Intelligence fits into recent Penbox releases.
If the output matches the source document, your template is ready to ship. If not, iterate in **Configure** — tighter validation, clearer field names, and sharper hints usually close the gap in one or two cycles.
***
## You're done
You have built and battle-tested a **Document Intelligence** template on **Penbox Intelligence**: human-readable validation, a strict extraction schema, and proof from a real upload. Swap the RIB for any document class you need — the workflow is the same, and the template is ready to plug into your Penbox flows.
***
## What's next?
Create or update templates programmatically via Pen Connect.
See how Document Intelligence fits into recent Penbox releases.