> ## Documentation Index
> Fetch the complete documentation index at: https://docs.penbox.io/llms.txt
> Use this file to discover all available pages before exploring further.
# Run Your First Case
> Put your case template to work — launch a case, collect data, and close it in minutes.
You've built your case template — now let's put it to work. This guide walks you through running a case from start to finish with a real new employee.
## What you'll do
By the end of this guide, you'll have:
* Launched a case from your template
* Sent a form to your new employee and collected their data
* Sent a welcome email
* Closed the case
**Estimated time:** 5 minutes (plus waiting for your employee to fill in the form)
Make sure you've already built your case template before starting. If not, check out [Build Your First Case Template](/guides/build-first-case-template) first.
***
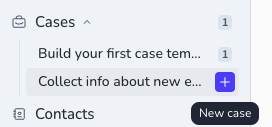
Find your case template **Collect info about new employee** in the Templates section, and click the **+** button next to it.
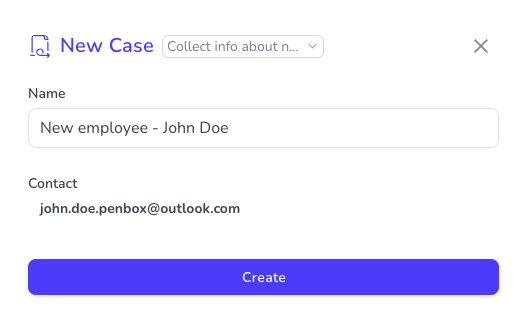
 Give your case a name (e.g., the employee's name), fill in the **email address** of your new employee, and click **Create**.
 Your case is now live and ready to go.
Open your first pre-configured step — the **email + form** step. Take a moment to review the email and form content, then hit **Send**.
Your case is now live and ready to go.
Open your first pre-configured step — the **email + form** step. Take a moment to review the email and form content, then hit **Send**.
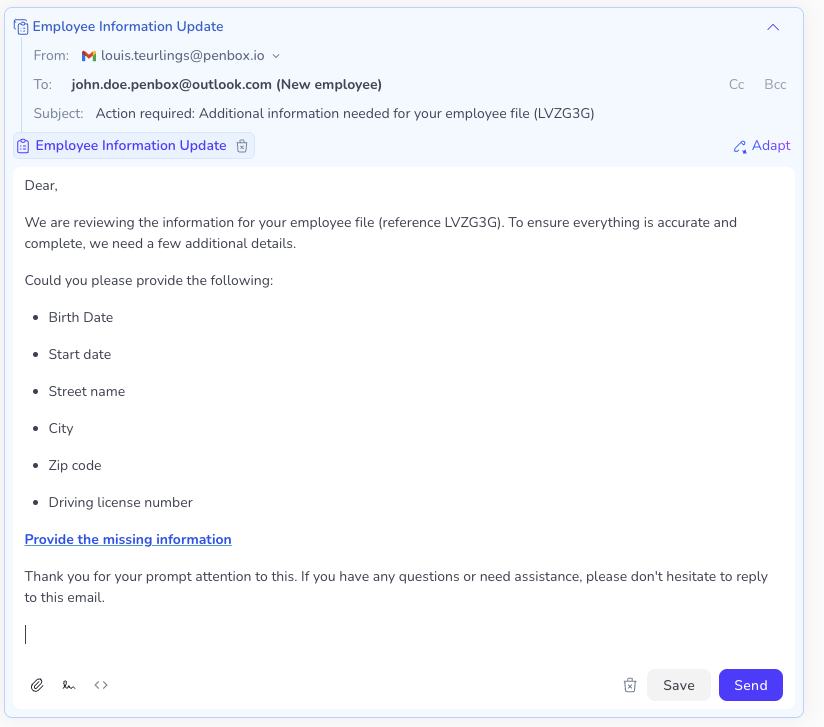 That's it on your end for now. Your new employee will receive an email invitation with a link to the form.
On their side, your new employee receives the email, opens the form, and fills in their details — birth date, start date, address, and so on.
When the first step is completed, you'll see all the data your employee submitted right inside your case.
That's it on your end for now. Your new employee will receive an email invitation with a link to the form.
On their side, your new employee receives the email, opens the form, and fills in their details — birth date, start date, address, and so on.
When the first step is completed, you'll see all the data your employee submitted right inside your case.
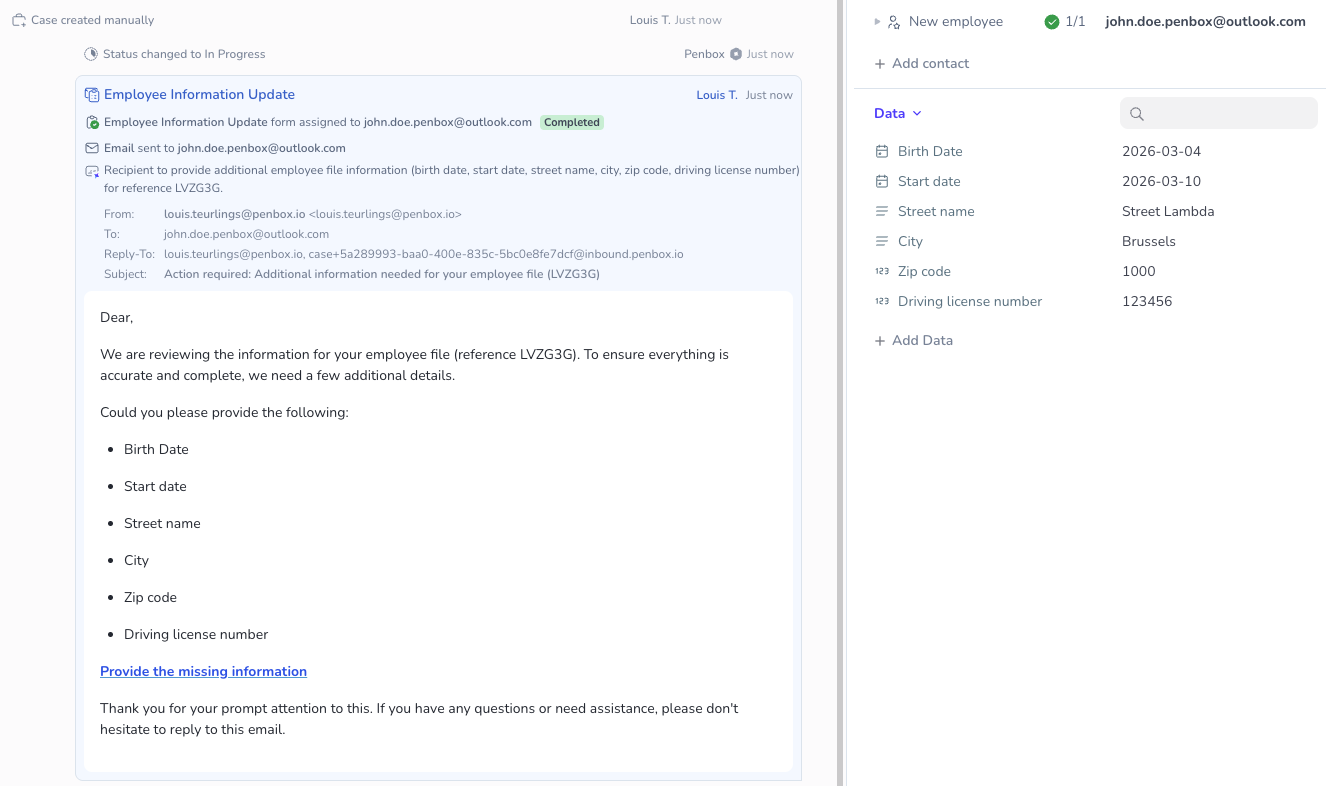 Take a moment to check everything looks good. If something needs correcting — say, a typo in the zip code — just click on the value and type in the correct one.
 You can edit any data field at any time, so don't worry if something needs updating later.
Now that you have all the information you need, it's time to move on to step two: thanking your new employee and welcoming them aboard.
Open the second step, review the email content (and tweak it if you'd like), then click **Send**.
You can edit any data field at any time, so don't worry if something needs updating later.
Now that you have all the information you need, it's time to move on to step two: thanking your new employee and welcoming them aboard.
Open the second step, review the email content (and tweak it if you'd like), then click **Send**.
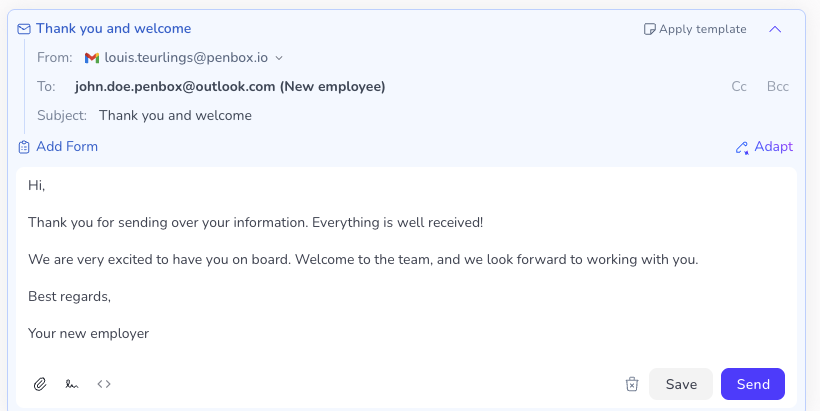 Your employee will receive a friendly confirmation that everything is in order.
Both steps are done — the data is collected and your employee has been welcomed. Time to wrap things up.
Click on the **status** of your case and switch it to **Closed**.
Your employee will receive a friendly confirmation that everything is in order.
Both steps are done — the data is collected and your employee has been welcomed. Time to wrap things up.
Click on the **status** of your case and switch it to **Closed**.
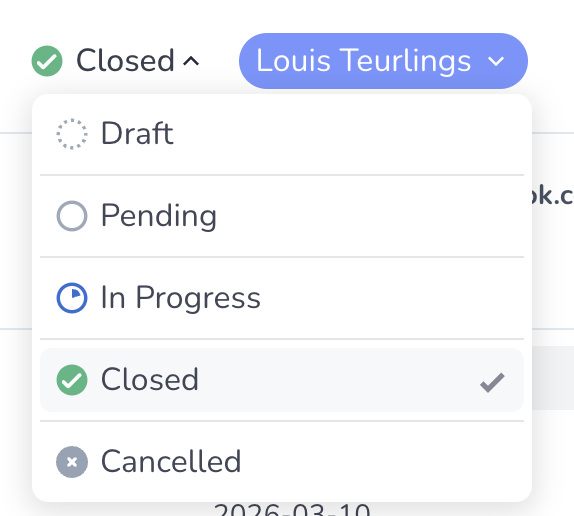 And that's it — your first case is complete!
***
## Recap
Here's what just happened in a few clicks:
1. You launched a case from your template
2. Penbox sent an automated form to your new employee
3. The employee filled it in, and the data landed directly in your case
4. You reviewed (and optionally edited) the data
5. You sent a welcome email
6. You closed the case
All of this without a single spreadsheet, manual email thread, or lost attachment.
***
## What's next?
Use the same template every time you onboard a new employee. Each case runs independently.
As your onboarding process evolves, update your template with new steps or additional data fields.
Case templates aren't just for onboarding — use them for client intake, document collection, vendor qualification, and more.
And that's it — your first case is complete!
***
## Recap
Here's what just happened in a few clicks:
1. You launched a case from your template
2. Penbox sent an automated form to your new employee
3. The employee filled it in, and the data landed directly in your case
4. You reviewed (and optionally edited) the data
5. You sent a welcome email
6. You closed the case
All of this without a single spreadsheet, manual email thread, or lost attachment.
***
## What's next?
Use the same template every time you onboard a new employee. Each case runs independently.
As your onboarding process evolves, update your template with new steps or additional data fields.
Case templates aren't just for onboarding — use them for client intake, document collection, vendor qualification, and more.