> ## Documentation Index
> Fetch the complete documentation index at: https://docs.penbox.io/llms.txt
> Use this file to discover all available pages before exploring further.
# Make a form available
> The different ways to send a Penbox form to your contacts and collect their responses.
Once you have created a form, you will want to send it out to collect responses from your contacts.
You have several options for sending a form:
* Directly from **Brio**
* From the **Penbox extension on Outlook**
* In bulk via a **Campaign** in Penbox
* Individually from **Penbox**
* Via a **generic link** on your website or in an email signature
This guide covers the last two options in detail.
***
## Send a form individually from Penbox
Go to your Penbox workspace.
Click the **+** next to **Forms**.
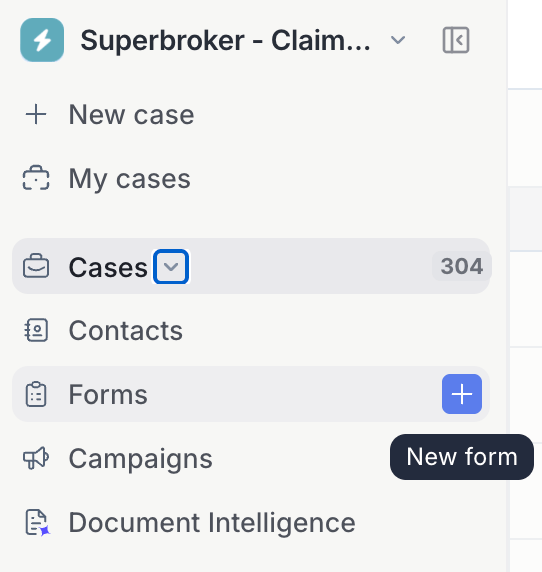 Select the form you want to send.
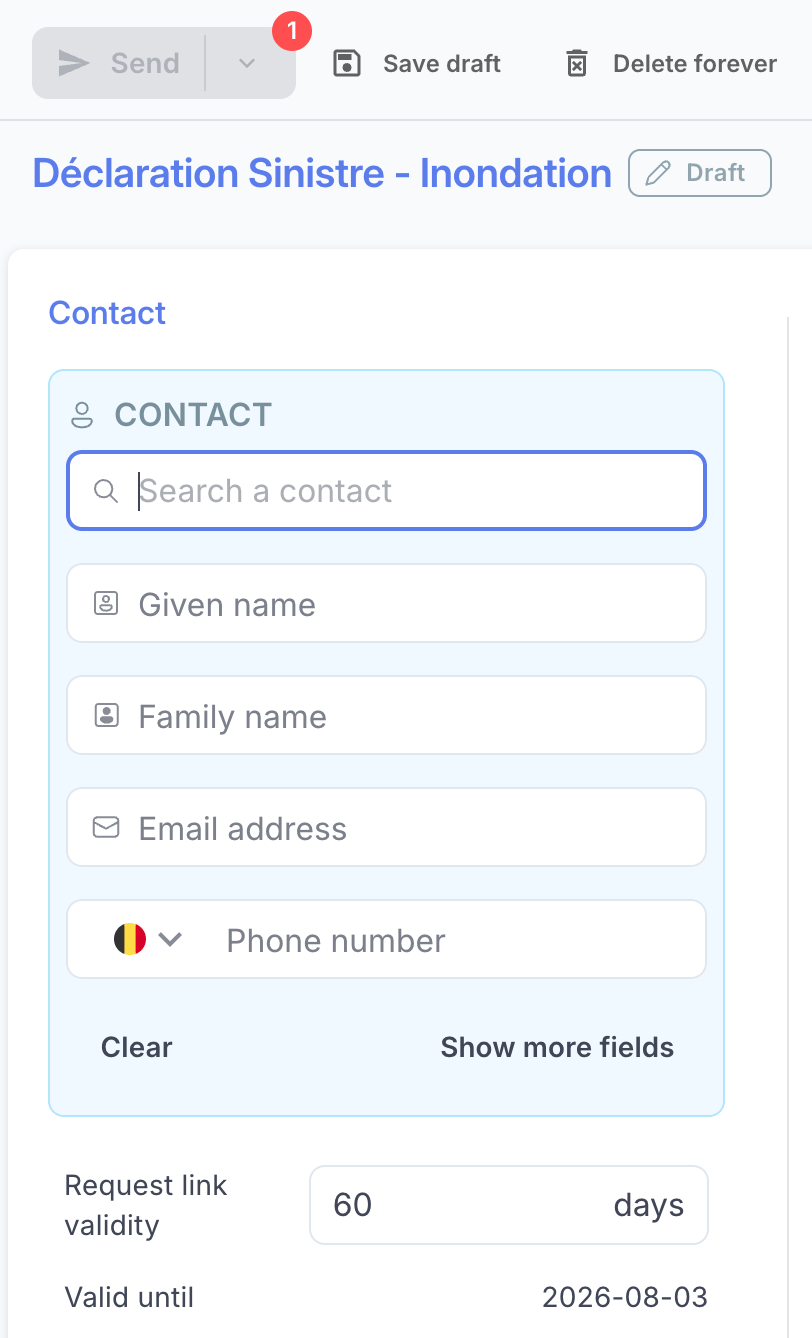
Set the person you want to send the form to:
* **Existing contact:** search by email address to check if the contact is already known in Penbox.
* **New contact:** fill in their first name, last name, email address, and phone number.
Click **Send**.
Select the form you want to send.
Set the person you want to send the form to:
* **Existing contact:** search by email address to check if the contact is already known in Penbox.
* **New contact:** fill in their first name, last name, email address, and phone number.
Click **Send**.
 Your contact will shortly receive an invitation to complete the form.
***
## Share a form via a generic link
You can make a form available via a generic link to embed on your website or add to an email signature.
Go to your Penbox workspace.
Click **Templates** → **Forms**, then select the form you want to share.
Click **Default options** and make sure that any mandatory options have a default value. If they don't, set them and click **Save**.
Go back to your form's home page and click **Copy link** in the **"Generic link to embed on your website"** banner.
Your contact will shortly receive an invitation to complete the form.
***
## Share a form via a generic link
You can make a form available via a generic link to embed on your website or add to an email signature.
Go to your Penbox workspace.
Click **Templates** → **Forms**, then select the form you want to share.
Click **Default options** and make sure that any mandatory options have a default value. If they don't, set them and click **Save**.
Go back to your form's home page and click **Copy link** in the **"Generic link to embed on your website"** banner.
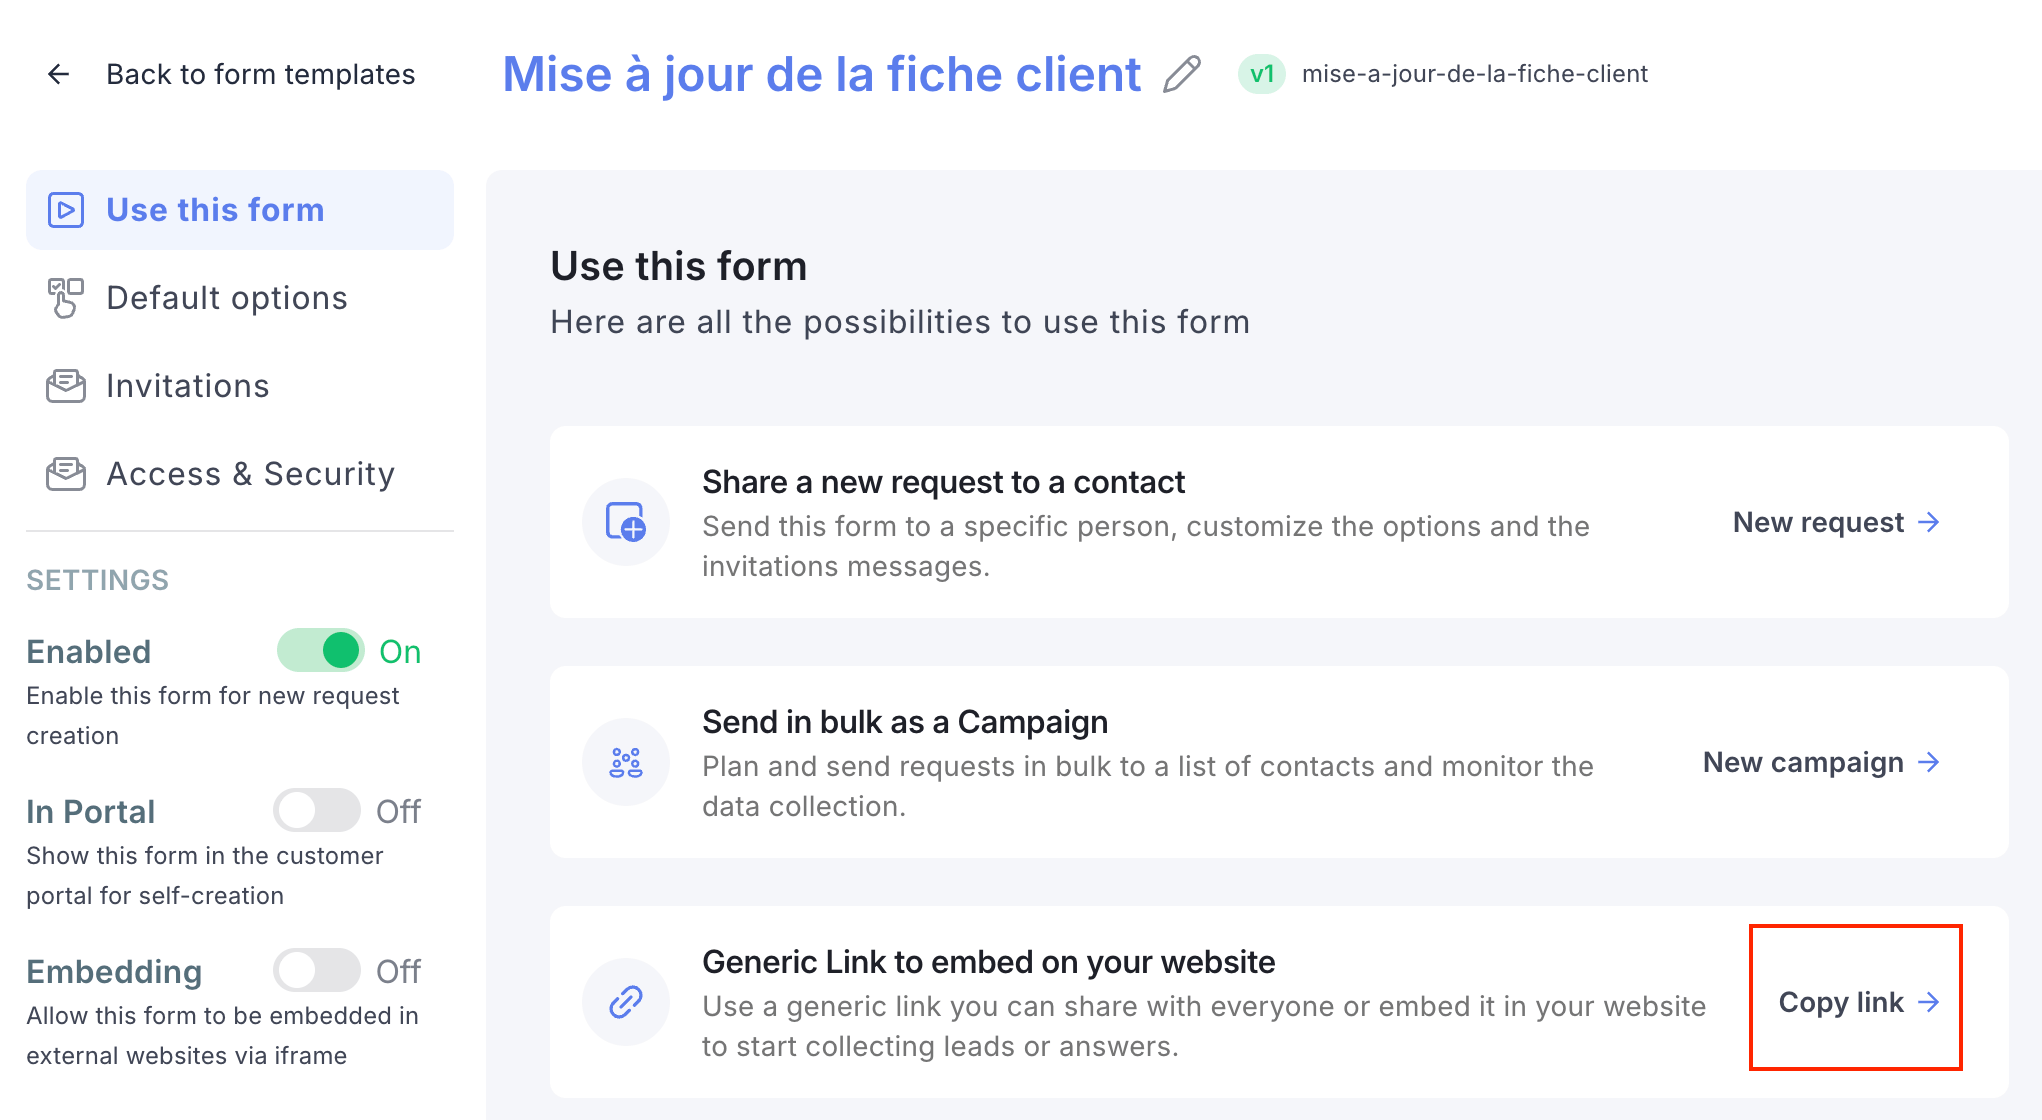 You now have a generic link that leads directly to your form.
***
## What's next?
Create a form template in Penbox from scratch.
Configure the invitation and reminder emails your contacts receive.
You now have a generic link that leads directly to your form.
***
## What's next?
Create a form template in Penbox from scratch.
Configure the invitation and reminder emails your contacts receive.