

What you’ll build
When you finish, your case template will have child statuses that match how your team works — for example, multiple steps under In Progress instead of a single generic label. You will have:- Opened Statuses from the template’s settings
- Either renamed existing child statuses or added new ones with + next to a parent
- Saved the lifecycle so new cases pick up the structure
Open your case template
In the sidebar, expand Templates, then click Cases.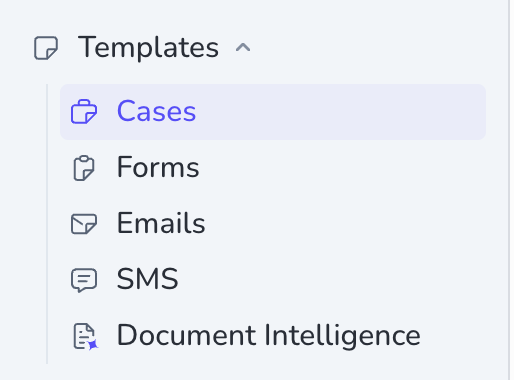 Click the case template you want to configure — for this walkthrough, open Collect info about new employee (or your own template).
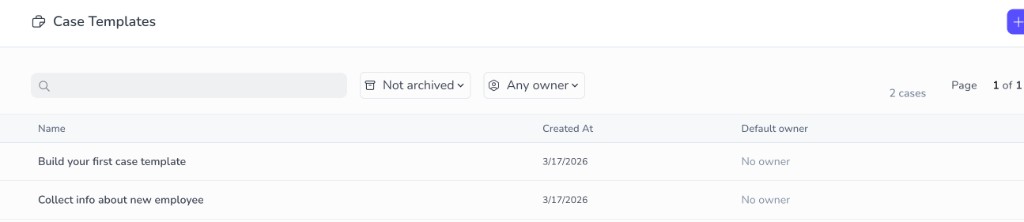
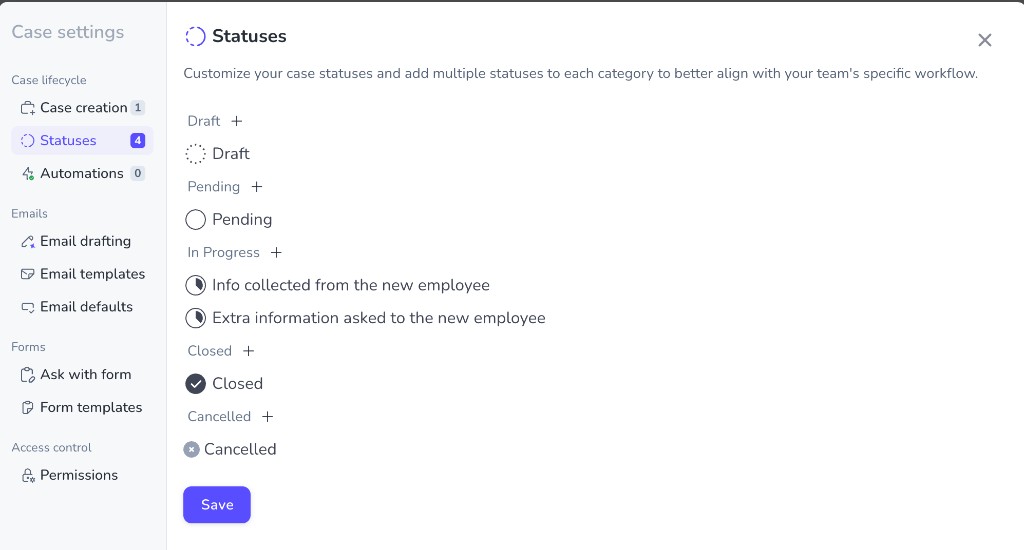
Open Case settings
In Template Edition, click the settings (gear) icon in the upper-right corner. In Case settings, under Case lifecycle, choose Statuses.
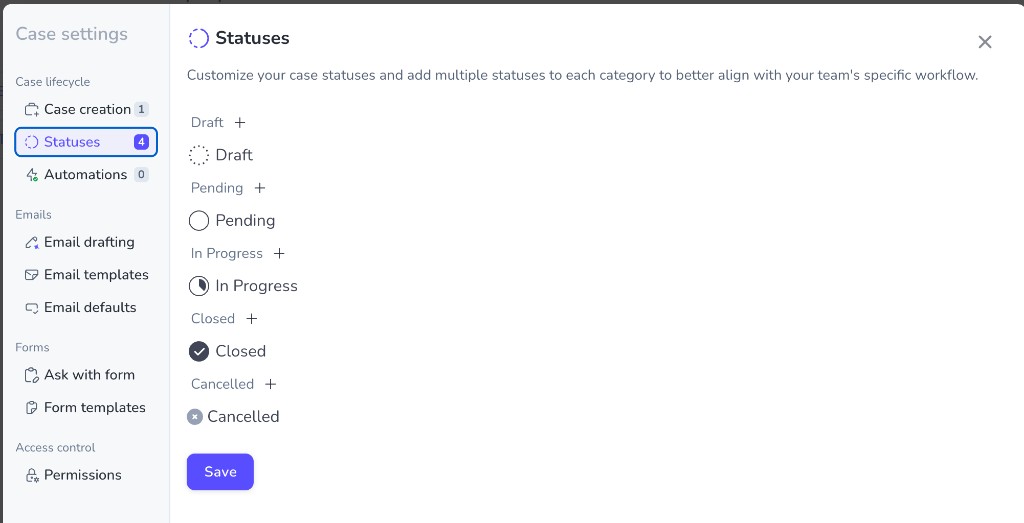
Configure child statuses
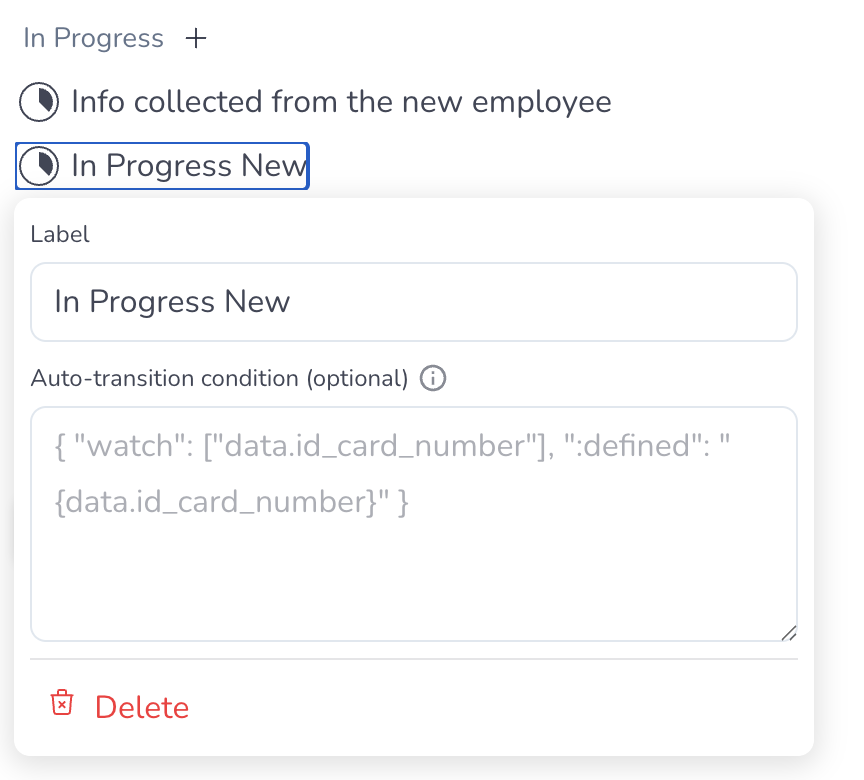
Penbox gives you five parent statuses — Draft, Pending, In Progress, Closed, and Cancelled. Each parent starts with one child status that shares its name. You refine the lifecycle by renaming those children or adding more under a parent.Rename an existing child statusClick the child you want to change, then edit the Label field. Add a new child status
 Click Save when the structure matches your process.
- Click + beside the parent (for example In Progress).
- Click the newly created child (it may appear with a default name such as In Progress New).
- Update Label to the name your team should see.
You’re done
Your case template now exposes child statuses that reflect how work actually moves. New cases still start in the first child under Draft by default. While a case is open, your team changes status manually from one value to the next unless you add automation elsewhere.What’s next?
Build your first case template
Create a template from scratch if you are new to case templates.
Run your first case
Walk through a case end-to-end in the app.
Statuses and lifecycle
Read how parent and child statuses fit the case lifecycle in Penbox.
Case templates
Deep-dive on case templates in the main documentation.